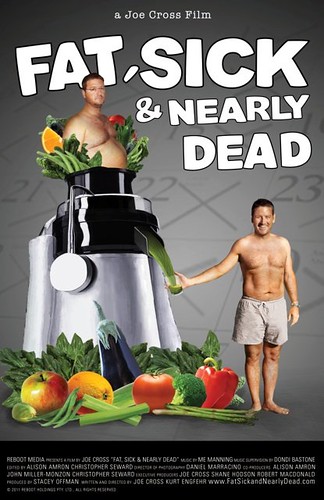
As I mentioned in my last post, Zak is on a 40 day juice fast.  To quickly recap, Zak watched Fat, Sick and Nearly Dead, a documentary film by Joe Cross about his 60 day juice fast that lead to an 82 lb weight loss, freeing himself of his autoimmune disease and getting off all his prescription medications.

I watched this documentary a few weeks ago, but Zak watched it when it was first released in 2011.  He was very inspired by the film and has talked about doing a juice fast “some day” ever since.  Thanks to a Biggest Loser style weight loss competition at work, he decided the time is finally here.

With that, his juice fast began about two weeks ago and on Day 1 he weighed in at 195 pounds.

Zak the Juice Man

This morning on Day 15 he weighed 178.6

That’s a 16.4 pound weight loss in two weeks!  I am freaking shocked, people.  Of course he’s got a major calorie deficit going so obviously he’s going to lose weight quickly, but still – it’s crazy fun to chase him into the bathroom each morning to see what the scale is going to say.

Weight loss was not his primary objective here, but he knew a juice fast would lead to weight loss and he’s not sad about that.  He says his clothes fit noticeably better and he definitely feels smaller.  He looks thinner too.  (He was last in the 170’s in 2011 and very kindly and thoughtfully gained weight along side me during my pregnancy with Kaz in 2011 – 2012.)

Zak’s main reasons for doing a juice fast were to detox from caffeine (coffee) and sugar.  He was also looking forward to the opportunity to improve his relationship with food and to be more mindful when it comes to eating.  Like so many of us, he’s prone to mindless snacking, raiding the candy dish at work, going back for second and third helpings simply because something tastes good, not because he’s still hungry.  I’ve totally been there and still struggle with these issues myself from time to time – mindful and intuitive eating is most definitely a journey.

With all that said, here’s a run down of some noteworthy items from the past two weeks:

The First Week

was the toughest.  He had caffeine withdrawal headache on Day 1, again on Day 2 (but less intense) and only intermittently on Day 3.  He battled insomnia on and off during the first week as well.

The Second Week

At the start of the second week, he started sleeping very soundly through the night, waking up feeling unbelievably refreshed and full of energy – more so than he ever remembers before.  He says he wakes up feeling great and extremely well rested, instead of sluggish and groggy and in need of caffeine NOW.

Frequently Asked Question #1 – Aren’t You Hungry ALL THE TIME?

Nope.  He says juice is surprisingly filling and satisfying.  When he feels hungry, he drinks juice and his hunger goes away.  He also drinks herbal (unsweetened) tea and water throughout the day.  He drinks Kombucha occasionally as well.

Even though he doesn’t feel constant hunger, he does admit that it’s hard to watch other people eat and to smell food cooking too.  He says he definitely misses eating.

(“Missing eating” makes me hungry just thinking about that.)

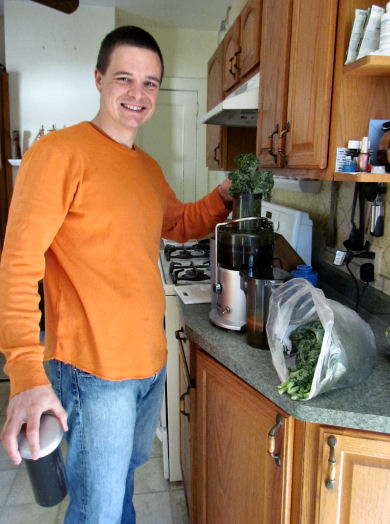
Frequently Asked Question #2 –  What Does a Typical Day Look Like?

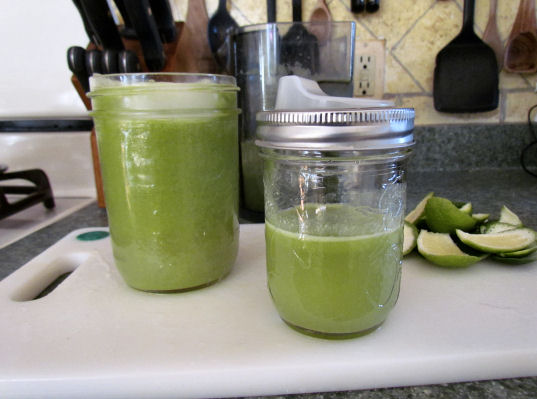
He makes a big (28+ oz) container of juice twice a day.  He takes the first round with him to work for breakfast and lunch.  He juices again when he gets home from work for dinner, and sometimes drinks a fourth glass if he feels like he needs it, or he saves it for the next day.  Most days he drinks three to four 16 oz glasses of juice.  Like any new habit or lifestyle change, it took some time to find a groove, but he seems to have settled into a rhythm that’s working well for him.

Two Glasses Beet Juice Breakfast and Lunch

Frequently Asked Question #3 – Don’t You Need Fiber?

It’s a little awkward to write about the final step in the digestion process (are you catching my drift?) but in short, the frequency of BM’s has slowed down, but beyond that they continue to be the same.

(And yes, he gets asked about the end of digestion a lot.)

The Grocery Bill

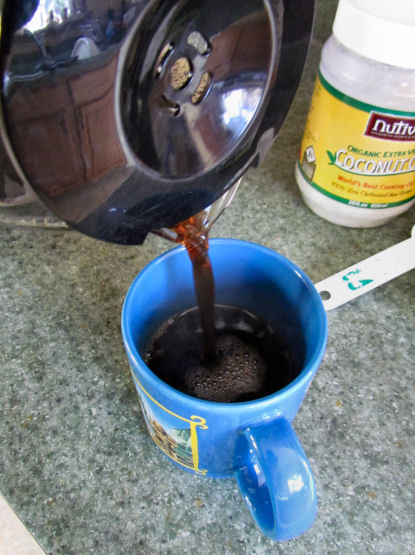
The grocery bill has gone up some, but not as much as I initially expected it to.  The cost of extra produce for juicing is being offset by the foods I’m NOT buying.  While I’m buying more produce, I’m buying less of other things.  I’m not buying coffee and creamer (both organic, neither exactly cheap!) right now either.  He’s also no longer going out to lunch a couple days a week or stopping for coffee on his way to work if he didn’t have time for a cup at home, so we’re cutting food costs there as well.

He also juices a lot of veggie scraps that would otherwise go to the compost.  Broccoli stems, leafy green stems (like from kale).  That was one way we’ve been able to stretch the produce budget a tiny bit more.

An Unexpected Perk For Me

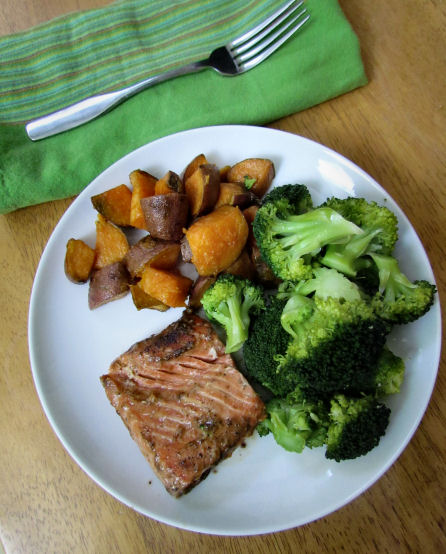
I don’t have to make dinner!  I feel like I’m on a little vacation!  Of course I’m still making food for myself and the kids, but I’ve been keeping it very simple.  There’s less planning involved and less worrying about the timing of dinner with the other things we’ve got going on during the day.  Somehow it just feels easier.

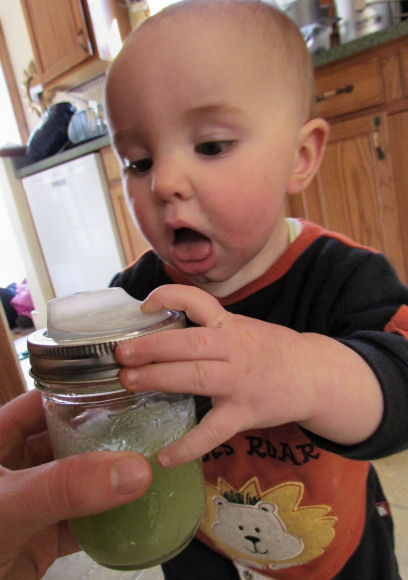
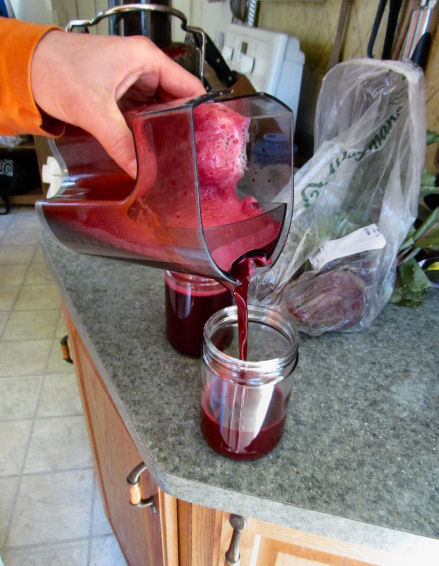
Another perk?  I’m drinking more juice right now than I otherwise would!

Beet Juice with Cuppow

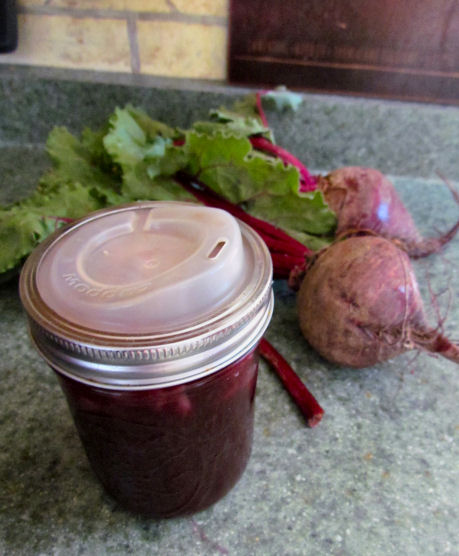
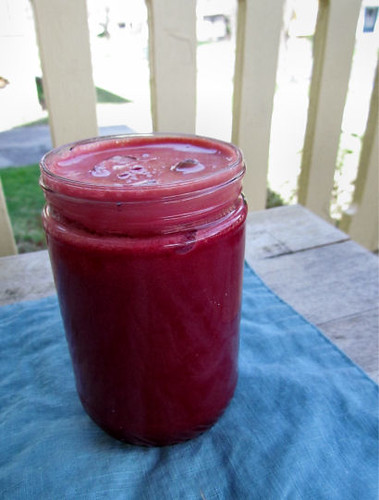
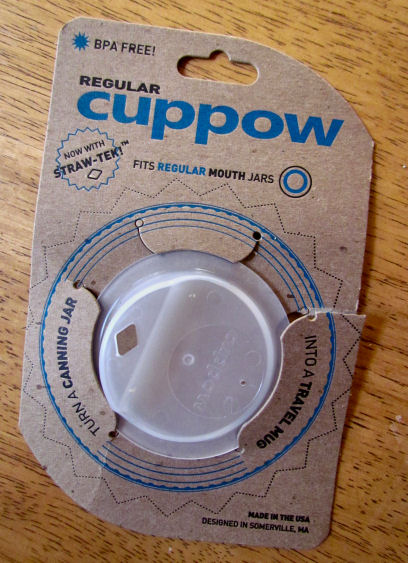
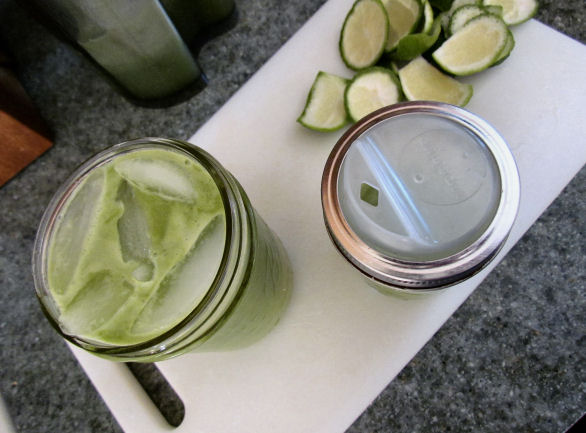
This morning is was beet, kale, cucumber, apple, ginger and lemon.  With a wide mouth Cuppow lid to save me from a beet mustache.

Now Some Perks for You!

The timing of Zak’s juice fast just so happened to perfectly coincide with the 2 year anniversary of Fat, Sick and Nearly Dead.  In honor of their celebration, I’ve been given the opportunity to give TWO readers a Fat, Sick and Nearly Dead prize pack!

Reboot With Joe Giveaway Prize Pack

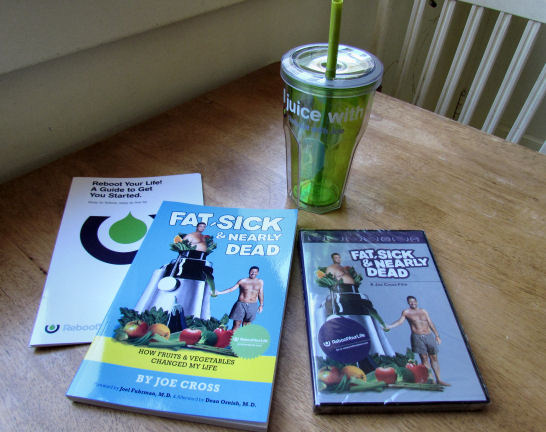
Each winner will receive a “I Juice With Joe” Reusable To- Go Tumbler, a DVD copy of Fat, Sick and Nearly Dead, the companion book, and a nutrition guide for getting started with juicing.

Even if a juice fast isn’t for you, it’s still an excellent film, and juicing can be a great way to get a lot of nutrition in a condensed package.  And who doesn’t love free stuff?!  Keep these for yourself, give  them to an interested friend, donate the DVD to your local library! (So long as they’ll agree to wave your late fees for the next year for you of course.)

Wanna chance to win one of these prize packs?  Leave a comment below telling me if you’d ever do a juice fast (doesn’t matter what your answer is!) and I’ll randomly choose two winners and update this post on Friday morning, May 10, 2013 announcing who won.  (This giveaway is open to continental US residents only.)

This giveaway is closed as of 5/10/2013, 7:55 AM EDT.

The winners of the Fat, Sick and Nearly Dead giveaway are

Courtney, who wrote:

I would love to try this, but as I am the cook for 3 young girls and a husband, it doesn’t seem doable for quite some time. So, for now I will be content to add juice to my diet and hope to benefit from the concentrated nutrients.

Kate, who wrote:

I probably would not do one, though the idea intrigues me. I have a hard enough time giving up my nightly scoop of ice cream (I have gotten it as low as a single spoonful, but for some reason I always feel like I need it!) so I can’t imagine giving up all solid foods for any real period of time.

Congrats ladies!  I’ve sent you both emails to get your juicy winnings on their way to you!

But what if you don’t want to play if you didn’t win and just want to watch the film already?   I mentioned this in my last post but it’s worth mentioning again – you can watch the movie for free on YouTube right now during the anniversary celebration.

Fat, Sick and Nearly Dead

That’s it for now, more juicy observations and notes to come in the weeks ahead.  In the mean time, got any questions for Zak?  Fire away in the comments!

As always, please don’t confuse Zak’s experience for medical advice.  Don’t do anything that feels unsafe to you, please seek the support of your trusted health care professional before doing a juice fast.


Please know that links to Amazon are affiliate links. It doesn’t change the price you pay, but if you buy something from Amazon after following one of the links in my posts, I earn a percentage based commission from Amazon as a part of their affiliate program. This is one of the ways I generate revenue from the posts that I write here. I promise that I only link to items that I truly endorse. You don’t ever have to buy anything, but if you do, thank you for supporting the site and the work I do here.


I’ve been hoarding links and things to share all month – I better get down to it before the month is over!

Why You Should Drink Warm Water and Lemon

After I read that article (the comments in particular!) I decided to try it.  Hot water with just lemon?  And no tea or anything else?  It was very simple, and I felt like it was worth a shot.  (a shot of lemon.)

It was… nice.  And then I made coffee (with coconut oil) because coffee is nice too.

How Warm Lemon Water Links to a Juice Fast

Fast forward a few weeks, Zak’s company starts a friendly “Biggest Loser” style weight loss competition among employees.  Zak decides to join them (if you ask him, he’ll say he doesn’t have a goal weight in mind, but in my wifely estimation I think he’ll wind up in the low to mid 170’s, which will mean a 20 – 25 lb weight loss.)  (Yes, I have his permission to blog about this and yes, we took a “before” picture… but he was in his underwear so I have some photo editing to do.  You’re welcome.)

With the weight loss competition as his impetus, he’s decided to do a juice fast.  He watched Fat, Sick and Nearly Dead when it was first released a couple years ago and like countless others, he was seriously awed and inspired by the film.  Since then he’s talked about doing a juice fast “someday” and always wanted to try it.  The detox part is his primary motivation, but the weight loss certainly plays a role in his interest in it too.  He says he’s ready for a break from sugar and caffeine (and has been reading Deep Nutrition!) and so with all that, the time for his juice fast is here.

Long story short?  Zak’s 8 days into a 40 day juice fast.  Our fridge looks like a farmer’s market.  And he’s down 11 lbs already.  (Seriously.)

And so because of his juice fast, I took a closer look at Joe Cross’s website to check out his variety of juice fasting plans and recipes.  Wouldn’t you know that each of his sample plans has you starting your day with hot water with lemon?  I’m not doing the juice fast, but I am starting each day fresh juice right now simply because the juicer is always running!  I’ve added hot water with with lemon into my morning routine and I’m digging it.

Zak’s juice fast includes getting off coffee though, and I’ve done that for now too – in part for myself, and in part for him so I don’t torture him with the smell of fresh brew each morning.  (I drank green tea for the first few mornings and managed to escape with no caffeine withdrawal headache.)  I am NOT giving up coffee forever, but now that it’s not so cold in the mornings I don’t feel like I need it, and I don’t mind taking a break from coffee every once in a while either.

The warm water with lemon is proving to be a refreshing, different start to each day.  If you’re at all intrigued, I highly suggest you give it a try!  (Even if you make yourself a cup of coffee immediately afterwards.)

You Can Watch Fat Sick and Nearly Dead For Free On YouTube for a limited time!

Fat, Sick and Nearly Dead
By pure coincidence (seriously!) I got an email from the folks at Fat, Sick and Nearly Dead at the end of last week asking if I’d help spread the word about their celebration of the 2 year anniversary of the release of the film.  I was really excited to learn that you can watch the documentary for free on YouTube right now and couldn’t wait to pass the word on.  If you haven’t already seen this movie, it’s a must-see.  (And did I mention it’s free?!)

Speaking of Weight Loss

I’ve mentioned Intermittent Fasting here a number of times before – it’s what I used in 2011 to lose a pesky 10 (*ahem*15) lbs that crept on during an emotionally taxing time, and I still practice IF in various forms today.

Even though Intermittent Fasting has been around for a long time, it’s really starting to catch on and get some attention by the mainstream media, thanks in large part to a best seller book that was published in February called The Fast Diet by Dr. Michael Mosley and Mimi Spencer.

A couple months ago a writer for Harper’s Bazaar contacted me to ask me about my experience with Intermittent Fasting for an article he was writing – and the article is in the May issue!

Harpers Bazaar May 2013

Lose Weight Fast? by Bill Gifford. My experience is mentioned (just briefly) in his article.

Intermittent Fasting Article in Harpers Bazaar May 2013

I like the way IF was presented in the article, you can read it online or check it out the next time you’re waiting in line in the grocery store.  (Although I’m sure Harper’s Bazaar would prefer that I recommend you actually buy a copy of the magazine instead of just reading it at the store… squealing in the magazine aisle like I did is optional.)

More Pure Coincidence

Your Fat Has a Brain.  Seriously.  And it’s Trying to Kill You.

This article showed up in my facebook feed a few weeks ago and only by chance did I happen to notice the author’s name: Bill Gifford.  Bill Gifford… where had I heard that name before?  Oh yeah!  The Harper’s Bazaar guy!  Apparently he writes for Outsider magazine too.  (Outsider is probably more my speed than Harper’s, but whatever.)

Anyway, the Brainy Fat article is a longer read than the IF article, but it’s entertaining and I enjoyed it, I think you might too.

The Easiest Way to Teach a Kid How to Ride a Bike

This is a link to an old post of mine, but with the arrival of the warm weather I’ve been reminded of the stress free way Ava and Maxine learned to ride a bike – without pedals!  The trick is learning how to balance first, THEN add pedaling later – instead of the other way around – a la training wheels.

If you’ve got a little one who will be learning to ride a bike this year (Maxine was 4!) a pedal-less bike is seriously the easiest way to do it.

Alright, that’s what I’ve got for you today.  Got any links you’re lovin’ on lately?  Thoughts or experiences with warm lemon water, juicing, fasting or bike riding?  Do tell!

(And I’ll definitely be sharing more about Zak’s juice fast in the weeks to come!)


Please know that links to Amazon are affiliate links. It doesn’t change the price you pay, but if you buy something from Amazon after following one of the links in my posts, I earn a percentage based commission from Amazon as a part of their affiliate program. This is one of the ways I generate revenue from the posts that I write here. I promise that I only link to items that I truly endorse. You don’t ever have to buy anything, but if you do, thank you for supporting the site and the work I do here.


So it’s done!  The Flower City Half Marathon has been run.  By me.  And 2,364 other people too.

Pre-Race

My day started dark and early around 5 AM.  I spent the early morning hours puttering around the house getting ready to go – putting together things for Zak, the kids and my mom who would be coming along later, and packing up my own bag too.  The race started at 7:30, so I had a little something to eat around 6:30 to give myself an hour for digestion.

Pre-Long Run Breakfast

A banana, a couple of the direct fuel bites I’d made the day before plus a few ounces of coconut water.  I aimed for something high in carbs (the banana and dates in the direct fuel bites) with a little bit of protein and fat too (coconut oil and walnuts).  During breakfast I filled my hand held water bottle with coconut water and put three direct fuel bites the zippered pouch wrapped in a small piece of wax paper.

The friends I was driving with came to pick me up around 6:45, and as I was climbing into the back seat I said “I think I have everything!  My bib, my sneakers – what else could I need?!”

Ummm, how about your watch, lady?  The one you put on the charger this morning and were going to be sure to remember before you walked out the door?

Except I didn’t say that to myself.  And nobody else said it either.  It was a Forehead-Smacking, Flopping-Back-and-Groaning moment when I realized I’d left my Garmin behind – but it was too late to go back now, and I immediately decided that it wasn’t a huge deal.  I didn’t need it to run, and if anything, it gave me good reason to practice staying completely present, focusing on how I was actually feeling to gauge my pace (imagine that?!) instead of relying on my watch to tell me how I was doing.

Miles 1 – 13.1

I probably went out a little fast at the start, it’s easy to get swept up in the pace of the other runners.  I was feeling good and breathing normally, but I knew I was running faster than usual.  I was definitely curious to hear the time announced at Mile 1 to know what my pace was, but somehow I completely missed the announcer.  (I found out later he was there, but on the opposite side of the road as me, announcing the time without a megaphone… the pack was still really thick at that point and we were also in a throng of spectators, so I didn’t hear him.)

Around Mile 2 the 1:50 pace group caught up with me.  I kept the pace with them for a while, but I had already accepted that this year wasn’t going to be a PR for me, so I eventually eased off and let them pull ahead.  They were probably running an 8:20/mile pace and it was too fast for me to hold on to knowing we still had 11 miles to go.

At Mile 4 I spotted a spectator wearing a watch and asked him the time – he said it was 8:04.  Doing the running math in my head – 4 miles in –> 34 minutes from the start = about 8:30/mile average pace.  I was feeling good, being mindful of my toes and feeling very glad that I wore a short sleeved shirt even though it was a chilly 50 degrees at the start.  I was plenty warm now!

At the 10K mark I noticed a man check his watch and asked him the time.  He said 53 minutes.  (6.2 miles, 53 minutes, an average 8:31/mile pace.)  I was a little shocked I was still comfortably running an 8:30.  I figured I wasn’t going to be able to hold on that pace for much longer, but it made me realize I could definitely pick up the pace during my week day runs here.

I spotted my family just before Mile 7 and swooped out of the pack for fly-by kisses and high fives for everybody.

At the 8 mile mark I asked another watch-wearing spectator the time, but before he could answer a runner behind me told me we were 1:13 minutes in – I knew I was now at about a 9:00 minute pace.  We had just finished the hilliest portion of the course, so it wasn’t much of a surprise that I’d slowed down some.  I then figured out that with 5.1 miles left, if I held on to my 9 minute pace for the rest of the race I could potentially finish in under 2 hours.  I had some hope, but knew I would be cutting it really close to the 2 hour mark and started to reconcile that I would probably be finishing after 2 hours.

That thought was confirmed when I was passed by the 2:00 pace group a few minutes later.  I tried to keep up with them but I was losing steam.  I had eaten 1 direct fuel bite about 5 minutes earlier, and decided to eat another one before I felt like I had even less energy.  It’s best to eat something BEFORE you feel like you need it.  (Looking back I should have gotten a direct fuel bite out when I ran through the gel stop at 10K mark – I wasn’t thinking about it though because I was focusing on running up our first of four big hills!)

At Mile 10 a spectator told me it was 9 AM, so that meant we were 1:30 minutes in.  With 10 miles behind me and 3.1 miles left to go, that would mean 10 minute miles for the last three miles to finish in under 2 hours.  It seemed possible, but doubtful – I was really starting to feel tired now.

Around Mile 11, one of my friends caught up with me.  I was so happy to see her and was glad to have her to chat with for some distraction for the final miles.  I was TIRED and very ready to Stop. Running.  When I asked her the time she said her watch had died at Mile 10, so our finish time was still a question mark!  We passed the Mile 12 sign and I was so glad to be in the home stretch.  With half a mile to go we passed an analog clock in front of a building and I saw the time was 9:30.  I remarked that we weren’t going to come in under two hours and she said light heartily “no big deal!  it’s been a great day!” and I knew she was totally right.

When the finish line came into sight, I could see that that clock said 2:0-something.  We picked up the pace for the home stretch and the time was 2:03 when I ran underneath it.

The End

My official time was 2:03:38.  An overall average pace of 9:26/mile.  72nd in my age group (F, 30 – 34) and 1132 out of 2365 runners.  Top 50 percent!  I’ll take it.

Although I’ll admit it’s a bit of a bummer that it wasn’t even close to the 1:51 I ran in both 2010 and 2011, I truly am happy with the way it all worked out.  Kaz was 10 months old yesterday!  I was definitely not in half marathon shape 12 weeks ago – it was well worth all the effort of the last 3 months to cross the finish line with a big smile on my face.

(I was also reminded of the thought I had exactly 10 months ago yesterday as I finished – “I Am So Glad That is Over”.  Big races and child birth definitely have some things in common.)

Other noteworthy items?

The Best Signs Made By Spectators

“Pain is temporary.  Your time will be on the internet forever.”

“Worst parade ever.”

Local Celebrity Sighting

I ran the entire race with Bob Lonsberry, a radio personality from Rochester.  I had no idea I was running near him until someone shouted out his name around Mile 5.  I unintentionally ended up staying with him for the rest of the race, and got a kick out of all the people who recognized him and shouted out “Bob Lonsberry!”, “Let’s go WHAM 1180!” and “I’m going to be your first caller on Monday morning!”  He was friendly and responded to everyone who called out to him.  (and I finished 22 seconds ahead of him!  WOOT!)

Post Race Food

At the finish I ate a banana and a couple Barenaked smoothie samples, and by the time I got home I was more than ready for breakfast.

Post Half Marathon Breakfast

A spinach, mushroom and red pepper omelet (that fell apart) with leftover sweet potatoes – it is not a mystery to me why food tastes even better after a big long run!

If you made it this far through my race recap, allow me to hang a medal around your neck!  Thanks to everyone for the well wishes, both online and in real life.  If you’ve got a half marathon or any big race coming up soon, good luck to you!  And be sure to remember that pain is temporary, but your time will be on the internet forever.


Please know that links to Amazon are affiliate links. It doesn’t change the price you pay, but if you buy something from Amazon after following one of the links in my posts, I earn a percentage based commission from Amazon as a part of their affiliate program. This is one of the ways I generate revenue from the posts that I write here. I promise that I only link to items that I truly endorse. You don’t ever have to buy anything, but if you do, thank you for supporting the site and the work I do here.


Less than 12 hours until Flower City Half Marathon!  I felt more excited about the race today than I have all week – the day almost here!

Workouts The Week Before a Race

I ran Monday and Tuesday this week (5.75 and 4 miles respectively) and 40 minute bike rides on Wednesday and Friday, 8 miles each.  I spent today taking it easy to rest up, although I did ride my bike to a yoga class and back (2 miles each way) this afternoon to help loosen up my legs and get my muscles moving just a bit.

FOOD the Day Before

I made Direct Fuel Bites today for my own race day nutrition like I did for the Steamtown Marathon in 2011.  I could use the gels they’ll be offering on the course, but now that I know how to make a more “whole foods” version of an energy snack, I much prefer to go this route.  (Does that make me seem snooty?  Probably.)  Oh well, these are really good!

Cutting Up Direct Fuel Bites

Made with coconut oil, dates and cocoa powder like the original recipe, but this time I added some chia seeds, goji berries and chopped walnuts too.  I’ll stick a couple of these squares into the pouch of my trusty handheld water bottle that I’ll be carrying tomorrow.  I plan to fill the water bottle with coconut water and sip a little every couple miles, and I’ll refill it with water at a water station if needed.

Direct Fuel Bites

I’ll probably eat a direct fuel bite near the one hour mark, or whenever I come upon the gels they’re giving out on the course.

In other Day-Before-A-Half-Marathon food news, we’ve been experimenting with all sorts of new juice combos lately (Zak’s doing a juice fast, more on that soon!) – this morning I made juice from 1/2 of a (large) beet, a couple carrots, two oranges and a few stalks of celery.

Beet Carrot and Orange Juice

Holy Magenta this was SO good!  I have never juiced oranges before, I think it’s safe to say this was sweetest juice I’ve ever made – and it was really friggin’ good.

For lunch it was my typical big salad with lots of greens that I like to be sure to eat the day before a big run.  I made an avocado smoothie with banana, blueberries and spinach about hour before yoga.  And for my pre-half marathon dinner, it was grilled salmon, steamed broccoli and roasted sweet potato.

Pre Half Marathon Dinner

Race Day Expectations

My half marathon PR was in the fall of 2009 for the Rochester Half Marathon with a 1:48.  I’ve run the Flower City Half Marathon twice before – in 2010 in 1:51:11, and in 2011 in 1:51:32.  For the 2012 race I was 7 months pregnant.  Kudos to you pregnant runners out there – that was not me.

So this will be my third time running this race, my fourth half marathon.  I do NOT expect to beat any personal records tomorrow.  To get near 1:50, I would need to average 8:30/mile, and I’m simply not running that fast these days.  I would really, really like to come in under 2 hours, which would mean a 9:00/mile minute mile pace, but honestly that’s probably wishful thinking.  We’ll see, race day endorphins can do crazy things!

Either way, I’m doing my best to keep in mind that the point of this race this was more about having a reason to stay motivated to run all winter, and was getting back to running some longer distances after after Kaz was born in June of last year.  It probably sounds terribly corny, but I really am going to simply enjoy all the fun that comes on race day – especially with a big race!  The palpable tension at the start, the beautiful weather we’re expecting tomorrow, the  super supportive spectators and really, just running with 2,500 other people through this city that I love.

(I’ve had way too much time to reflect on this race today.  Get the hook!)

And with that, I’m off!  I’ll be back with a race recap tomorrow.  If you’re racing this weekend, good luck to you!  I hope you ate something green today!


Please know that links to Amazon are affiliate links. It doesn’t change the price you pay, but if you buy something from Amazon after following one of the links in my posts, I earn a percentage based commission from Amazon as a part of their affiliate program. This is one of the ways I generate revenue from the posts that I write here. I promise that I only link to items that I truly endorse. You don’t ever have to buy anything, but if you do, thank you for supporting the site and the work I do here.


The Flower City Half Marathon is one week from today.  Like most runners right now, I’m feeling pretty nostalgic about the sport of running in light of what’s happened in Boston over the past week here.  I’ve had this post in the works for a while, but my running woes and sore toes suddenly felt insignificant on April 15, 2013.

With that said, running can be a healthy way to deal with tragedy or stress –> and sore toes can keep you from running!  This post is for anyone who has struggled with sore toes so you can get out there and keep running.  This is where my riveting sore toes tale begins, to give you some ideas of what to try when toe pain strikes – or better yet, beat it to the punch.

The Story of Sore Toes

(sounds like a best seller already)

As my weekend long runs have grown longer over the past 5 weeks of half marathon training (9, 10, 9, 10 and 11 miles respectively) my toes were starting to go numb around the 7 or 8 mile mark, eventually leading to pain for last 2 – 3 miles of those runs.  Toe pain can be related to improper form, but in my experience, numb toes and/or sore toes usually has to do with my sneakers.  Toe pain typically means that your shoes are too small or are tied too tightly.

To back up for a moment, I bought a new pair of running sneakers in the fall of last year, shortly after my return to running from my hiatus during pregnancy #3.  I went with my usual Asics Gel Nimbus, version 14.  I came to find that I didn’t love this pair as much as I’ve loved my Asics Gel Nimbus’s (Nimbi?) of the past.  I like Asics because they usually have a nice, wide toe box – but this version didn’t seem quite as wide as usual.  They were fine in general, but not as comfortable as I’d come to expect based on my experience from running in my previous pairs of the same model.

Having run 3, 4, 5 and 6 miles in these sneakers all fall and winter without any significant toe issues, I wondered if my toe pain might resolve itself as my feet become more accustomed to running longer distances again.  But after my third sore-toed long run, I was thoroughly annoyed that this issue wasn’t going away.  Something had to give, and so I concluded that it was probably time for a new pair of shoes.  Given that your feet can grow a little bit with each pregnancy, I wondered if I might now need to go up another half size.  My Nimbus 14’s were only one half size up, as I’ve always done in the past – but maybe a full size up would help.

It’s recommended to go “one half to a full size up” from your regular shoe size for running sneakers.  You want to give your feet plenty of room to spread out thanks to the impact of your body weight on your feet while running.  Buying running shoes a half size up can save you from blisters and black toe nails if your feet are squashing into the front of your shoe.  If you’re having issues with your feet that you can’t figure out, I highly suggest a shoe fitting and stride evaluation at your local running store.  It’s almost always free and the proper shoe can make a big difference in the way you feel while running.

So with all this in mind, I bought a new pair of sneakers a few weeks ago.  Asics Gel Kayano 18, a full size up instead of a half size, to be sure my toes had PLENTY of room to do their thing.

Gel Kayano 18

The Kayano’s are the next model up from the Nimbus.  They are admittedly the most expensive pair of running shoes I have ever owned.  I would not usually spend so much on a pair of sneakers, but this time around I had birthday money to spend, plus two store coupons that saved me a good chunk of change as well.  It’s good to know that the most expensive shoe isn’t necessarily the best shoe, but these felt really, really good when I tried them on, so I went for it.

And while the proper size is important, proper fit is important too.  Figuring out how to adjust your laces can help you get that proper fit.  Thanks to the advice of many runners – from the running shoe store employees to running friends and family to the Good People of Internet, this is my approach to adjusting my laces to keep sore toes at bay.

Step 1: Loosen, Loosen, Loosen

Really Loose Laces

Starting with the laces closest to the toes, pull the laces waaaay out so you have a lot of slack at the toes.

With the laces still very loose, stick your feet in.

Stick Feet In

Row by row, pull the laces so you remove most of the slack, but not all of it.  You’ll want to leave a little extra shoe lace for your shoe settle in around your foot as you run.

Not Tight

Step 2: Lace Locking

With your laces relatively loose over the top of the foot, you’ll need to secure your shoes at the ankle to keep your foot from sliding around in the shoe, which has the potential to lead to blisters or chaffing.  This is where “lace locking” comes into play.

Shoe Lace Locks

Using the two lace holes at the top of your shoe, create a loop that will be your “lock” to help hold your shoes in place around your ankle.

Shoe Lace Tracking

Thread the opposite end of your lace through your lock –

Laces Through Loops

and then tighten comfortably, but still without OVER tightening.

Now Tighten

Finally, tie as usual.  (I’m going to go ahead and skip the pictures with arrows for this step.)

Tie As Usual

Step 3: Tweak During a Run As Needed

Assuming that you’re in the right size shoe, steps 1 and 2 should get you really close to being perfectly comfortable in your sneakers on a run.  Even with a bigger shoe, loose laces and plenty of room up front, I still had a little toe numbness during the first few runs in with these shoes!

If you notice toe numbness during your run (numb toes is what precedes sore toes), don’t be afraid to stop mid run to re-loosen, re-adjust and re-tie your sneakers until you find the sweet spot for your feet inside your shoes.  Eventually, your laces should settle into the perfect place and you’ll be in and out of your shoes without having to give it so much thought.

There are other approaches to lacing based on where you’re feeling pain.  This video had some great, easy to follow techniques that you might find helpful to try.

When Proper Shoe Fit Isn’t Helping

If you suspect that something is off with your form, you could seek the help of a running coach, or you could read about running form to get some ideas on how to improve and what to practice.  Chi Running by Danny Dreyer is one of my favorite books on running form.  Born to Run by Christopher McDougall is an incredible, inspiring read about overcoming pain and injury by learning proper form through barefoot running.  (Born to Run is a great read for runners and non-runners alike, really!)

I hope this might help if you’re dealing with toe issues like I was.  Have you dealt with sore toes in the past?  Do you have any tips to share on what’s worked (or what hasn’t worked) for you?


Please know that links to Amazon are affiliate links. It doesn’t change the price you pay, but if you buy something from Amazon after following one of the links in my posts, I earn a percentage based commission from Amazon as a part of their affiliate program. This is one of the ways I generate revenue from the posts that I write here. I promise that I only link to items that I truly endorse. You don’t ever have to buy anything, but if you do, thank you for supporting the site and the work I do here.


Did you know yesterday was Earth Day?  Well, Monday is Earth Day, but we celebrated on Friday.  And I spent Friday thinking it was Earth Day.  Whoops.

Monday, Friday, whatever.  On Friday we got together with one of our homeschooling groups for a fun, low key Earth Day event for families.  Each family was invited to share something with the group – like a science project or even just an idea. We decided to demonstrate how we make one of our favorite healthy snacks – date balls!

I decided on date balls because they are round… like the earth.

Date Balls

So maybe it’s a stretch.  Don’t think too hard about it and just eat an earth-shaped treat already, wouldya?

Whenever I make date balls I usually add rolled oats and always include nuts in some form like almond butter, peanut butter or cashews.  This time though they needed to be nut free and gluten free for any friends with nut allergies or gluten sensitivities.

With nut free and gluten free ingredients in mind, I got down to business trying to figure out what combination of ingredients would hold together well, but still taste good too.

Goji Berries and Dates

For a nut butter substitute I tried both sunbutter and tahini.  My taste testers here liked both options, but I ended up using tahini for the demonstration and it’s what I’ve included in the recipe below as well.  I don’t think you’ll go wrong with either sunbutter or tahini (but for the record, I think these are better with almond butter or peanut butter.  Of course then they will no longer be “nut free”… but I don’t need to tell you that.)

Thanks to my friend Bianca and her Chocolate Fudgey Goodness recipe, I was inspired to add Goji berries to these dates balls as well.

Goji Berries

Ummm, yeah – goji berries are my new favorite thing to add to no-bake cookies.  They are chewy and fun and I don’t even care that I type “gogi” every time I go to type “goji”, which is totally because it’s pronounced “go-gee”.  Stinking phonetics.

When I told a fellow homeschooling mama what I was making and why I decided on date balls for this Earth Day event, she called them Earth Balls!  I loved that, so we’re rollin’ with the Earth Ball title here.  (But I promise they don’t taste like dirt.)

Earth Balls

Print this recipe!

yield: about 18 – 22 Earth balls

(no bake, gluten free, dairy free and [optionally] nut free)

1 – 1 ½ c pitted Medjool dates (10 – 15 large dates)
1/2 c tahini (or other seed or nut butter)
1/2 c unsweetened cocoa powder
2 Tbsp maple syrup

If your dates are really firm, soak them in hot water for 10 – 15 minutes (after pits have been removed) to soften.

In food processor or high speed blender, combine dates, tahini, cocoa powder and maple syrup.  Stop food processor to scrape sides if necessary and resume blending until all ingredients are mixed well and have formed a big pile of… well,

Date Ball Dough

date ball dough.

(What did you think I was going to say?)

Goji berries are optional, but if you decide to add them, I do suggest chopping them up separately ahead of time because they are REALLY chewy.  (And that’s precisely what makes them so good!)  Chopping them into small pieces helps with the chewability factor.

Goji Berries in Food Processor Chopped Goji Berries

Fold goji berries into your date ball dough.

Add Chopped Goji Berries Stir In Gojis

Pinch off 1 – 1 ½ tbsp of the dough and roll into balls with your hands.  Or form into squares.  Or hearts.  Or the infinity symbol.  Whatever you want, go nuts!  (But not if you’re allergic.)

I like to refrigerate these for 15 – 20 minutes before serving to allow them to firm up a bit – I would recommend storing them in the refrigerator as well.

If you’re feeling sassy, you can then roll them in shredded coconut, chopped nuts or cocoa powder to make them look a little more appealing and a little less like greasy brown blobs.  I made a variety of them ahead of time, to go along with the date balls we’d be making during our demonstration.  Some were coated coconut and others were left naked for any coconut haters.  (Is “coconut hater” too harsh?  How about “coconut avoider”.)

Variety of Date Balls

One of the my favorite aspects to these date balls is how versatile they are.  You can easily tweak them to your own tastes or dietary needs.  You can use different nut butters, stir in chocolate chips, shredded coconut, chopped nuts, raisins, dried cranberries, different spices like cinnamon, nutmeg, ginger or add a little vanilla extract or peppermint oil.

There are lots of ways to go and still wind up with a very delicious and health(ier than a package of Oreo’s) snack each time!  These are great to bring to a pot luck, as part of a snack for bunch of kids or simply to have on hand for yourself when you want a treat that isn’t frankenfood.

Eat up and enjoy – and be good to the earth too or something, K?


Please know that links to Amazon are affiliate links. It doesn’t change the price you pay, but if you buy something from Amazon after following one of the links in my posts, I earn a percentage based commission from Amazon as a part of their affiliate program. This is one of the ways I generate revenue from the posts that I write here. I promise that I only link to items that I truly endorse. You don’t ever have to buy anything, but if you do, thank you for supporting the site and the work I do here.


This is quinoa and sauteed kale in a sauce made from red peppers, onions and tahini.  I initially made this to stuff into portobello mushroom caps, but this stuff was so stuffin’ good that we’re going to focus more on the stuffing instead of what was stuffed.

Quinoa Kale Stuffing

Stuff this into mushrooms if you like, but you could just as easily choose to eat this as-is and call it lunch.  Or use it as a side at dinner. Or as dinner itself.  Or even for breakfast.  Watch me eat this for breakfast tomorrow.  WATCH ME!

(ok, maybe don’t watch me.  that’s a little creepy.)

To cook quinoa, combine 1 cup rinsed quinoa with 2 cups of water .  Bring to a boil, reduce to a simmer for 10 – 15 minutes until all water is absorbed and quinoa is soft and fluffy. Makes about 3 cups.

While we’re talking about quinoa, let’s take a quick detour to talk about the best quinoa strainer in the world.

Best. Quinoa. Strainer. Ever.

I initially bought this strainer for making bone broth, but I’ve used for straining my own yogurt and now I’ve come to discover that it’s the perfect quinoa strainer too.   When quinoa first arrived on the scene years ago, it was recommended to rinse your quinoa before cooking it to help get rid of the bitter saponins (but I wonder if this is really necessary with the quinoa sold on store shelves nowadays?)

Whatever the case, I still rinse.  I use to cringe a little whenever it was time to make quinoa because I was always losing some quinoa down the drain during rinsing.  The holes in my smallest strainer were still too big for quinoa.  But now with this strainer I feel joy in my heart when it’s time to make quinoa.  I snag my stainless steel strainer, grab my quinoa and then waltz from the pantry to the sink while singing LA LA LA NO LOST QUINOA SUCKAS!

(You get dinner AND a show here, folks.)

Detour over.  Let’s get back on road to Stuffingville.

Kale and Quinoa Stuffing

(with Red Pepper, Onion and Tahini Sauce)

print this recipe!

2 1/2 c cooked quinoa

2 – 3 Tbsp olive oil
4 cloves of garlic, minced (feel free to use less if that’s too much for you!)
1/2 white onion, diced
1/2 red pepper, diced

2 Tbsp tahini
juice from 1 lemon
1 tsp maple syrup
salt to taste

1 bunch of kale, rinsed and chopped

With your quinoa prepped (either at the same time or ahead of time, remember this is your own adventure) get to sauteing your onion, red pepper and garlic in olive oil.

Kitchen Mess

Once all vegetables are soft, transfer to the food processor or blender with tahini, lemon juice, maple syrup and salt.

Red Pepper Onion and Garlic Sauce with Tahini and Lemon

Holy (this is not) guacamole – this.is.scary.good.

Chop kale into bite sized pieces and add to your now-vacant veggie pot, sauteing in olive oil until soft.

Bite Sized Kale Saute Chopped Kale

When your kale is ready, gently combine cooked quinoa, vegetable sauce and sample.  And sample again.  And sample again.  Sample as many times as Your Own Adventure requires.

Fold Together Quinoa Kale and Sauce

If you choose to stuff this into mushrooms – remove the stem and scrape out the gills with a spoon.  Lightly oil the tops of the mushrooms and place on a baking sheet.  Bake at 350 for about 15 minutes.

Roasted Portabella Mushrooms

Drain and pat dry with a paper towel before stuffing.

Stuffed Portabellas

At this point, this recipe is vegan.  If you are on a Vegetarian Adventure, you could choose to de-veganize these and add a little shredded cheese – I went with shredded parm.

Stuffed Portabella's Topped with Shredded Parm

If you’ve got stuffing left over (there was probably enough to stuff 3 more portobello mushrooms) put the rest away for a Kale and Quinoa Breakfast Adventure tomorrow.

Kale and Quinoa in Red Pepper, Garlic, Onion and Tahini Sauce

Put stuffed mushrooms back into your 350 degree oven for 6 – 8 minutes, or until heated through and cheese has melted.

Quinoa and Kale Stuffed Portabella Mushroom

You could easily use this for stuffed peppers too. Or just stuff it into a bowl. Whichever path your adventure takes you down, I promise you’ll be stuffing this into your face.


Please know that links to Amazon are affiliate links. It doesn’t change the price you pay, but if you buy something from Amazon after following one of the links in my posts, I earn a percentage based commission from Amazon as a part of their affiliate program. This is one of the ways I generate revenue from the posts that I write here. I promise that I only link to items that I truly endorse. You don’t ever have to buy anything, but if you do, thank you for supporting the site and the work I do here.


Have you heard of Cuppow?

Cuppow

It’s a drinkable lid that you can use with a canning jar.

(I think I’ve made it obvious that we like to drink out of canning jars here?)

I love canning jars as glasses mostly because they’re so sturdy – when the girls were really little I was frustrated with how frequently regular glasses were breaking.  I soon noticed that the few small and wide mouth canning jars we had hanging around were the only glasses that were holding up.  I eventually stopped replacing our broken glasses altogether and just used canning jars and old almond butter jars instead.  Soon, our entire glasswear collection consisted of glasses with threading at the top.  Oops.

A few weeks ago I posted a picture of Kaz’s green mustache after his sampling of a little green lemonade.  A friend then left a comment asking me if I knew about Cuppow – a sippy lid for canning jars.   I hadn’t heard of Cuppow, but I checked it out and I love the concept.  A sippy lid to use on glasses we already have!  It fits perfectly under the ring for the jar.  It’s small and durable, reusable and dishwasher safe – and I LOVE that this is going to save us from the clutter of a million plastic sippy cups.  (Been there, done that.)  Our once-little-now-bigger girls love drinking out of this too, and it makes a great travel cup kids and adults alike.

We were gifted our first Cuppow by a very sweet friend a few days ago, so we gave it a try!

Cuppow Lid

Celery, pear, ginger and lime juice (with cucumber this time too) is my new favorite juice combo.  The celery has this slight “salty” flavor to it – I really like it.  And it was the perfect juice to take our new Cuppow lid for a spin.

Juice for me and a little for Kaz today too.

One for Baby

He knew exactly what to do with it!  Amazing!  Or maybe he just puts EVERYTHING into his mouth – food, Cuppow or otherwise.

He Knows What To Do

For what it’s worth, whenever I say “Cuppow”, I have this urge to put a strong emphasis on the “pow” part of the name – like, CupPOW!  And then I imagine doing a right uppercut to the chin of whomever is standing nearest to me.

Cuppow.  Kah POW!  Maybe that’s what they were getting at when they decided on a name?  I’m fast like that.

(No, I did not give my baby an uppercut to the chin before I offered him some Celery Pear Lime and Ginger juice.)

Anyways.

The opening in the lid is a little big for my 9 month old guy as a relative newbie to drinking from a cup.  Liquid comes out sort of fast for him right now – but he’ll obviously get the hang of it with time.  The girls think Cuppow is totally fun to drink from and I can see using the widemouth lid for myself or Zak to take a drink along on the go.

I wrote this post because I am truly excited about this product.  I couldn’t wait to spread the word to my other canning jar drinking friends in this world – I know we’re not the only ones out there drinking from glass jars!  This is also great for those of you who prefer to avoid eating and drinking from plastic whenever you can – Cuppow can be an affordable way to make it really easy to take glass with you on the go.

But if I’m going to tell you about it, it’s way more fun to spread the Cuppow love while I’m at it.  I emailed the good people at Cuppow to find out if they’d help me do a giveaway along with my post – and Cuppow very generously offered to give away two of their lids (one regular mouth and one wide mouth) to TWO READERS!

Wanna play?  Leave a comment telling me a.) why you drink out of canning jars OR b.) that you don’t currently drink out of a canning jar, but this lid makes it look totally fun and now you want to try it!

This giveaway is now closed as of April 12, 2013, 7:42 AM EDT.  Thanks to everyone for playing – a big CUPPOW! congrats to:

K J

who wrote:

“We drink out of canning jars here quite often…mostly b/c we have so many! Would love a cuppow!”

Lea Shelton

who wrote:

“I am so excited to try out a cupwow with my 16 month old! He loves drinking from cups, but I hate how hard it is to clean sippy cups!! As for canning jars, I’m kind of a jar-saving junkie! I just can’t get rid of a jar that I can imagine might somehow, someday be useful!”


PLUS!  You can get up to three additional entries if you help Cuppow out with their social media following:

Like Cuppow on Facebook
Follow Cuppow on Twitter
Follow Cuppow on Instagram

If you follow/like Cuppow on any of those social media channels, mention it in your comment to increase your odds of winning!  I will update this post announcing two winners on Friday morning, April 12, 2013.

I know you’ll love Cuppow as much as I do.  Good luck!  Now go drink green juice and be merry!


Please know that links to Amazon are affiliate links. It doesn’t change the price you pay, but if you buy something from Amazon after following one of the links in my posts, I earn a percentage based commission from Amazon as a part of their affiliate program. This is one of the ways I generate revenue from the posts that I write here. I promise that I only link to items that I truly endorse. You don’t ever have to buy anything, but if you do, thank you for supporting the site and the work I do here.


Coconut Oil Coffee

April 7th, 2013 | Posted by Alison Spath in Fitness - (43 Comments)

Coffee pot, blender, coconut oil, cream… what are we making today?

How to Make Coconut Oil Coffee

We’re making coconut oil coffee!

No, I have not lost my mind. Yes, I realize coconut oil in coffee might sound crazy, but it’s good!  You won’t believe it until you try it.  I sure didn’t.

I’d heard (read) about people putting coconut oil in coffee when I started reading about Intermittent Fasting a couple years ago.  I’ve been in love with coconut oil and all of its benefits for quite some time now, but the idea of putting coconut oil in coffee seemed a little extreme and frankly, sort of gross.

Why Put Coconut Oil in Coffee?

Coffee with coconut oil is coffee with staying power. I’ve come to find that a cup of coffee made with coconut oil and a little heavy cream (or half and half) gives me a nice, sustained energy boost thanks to the way the body metabolizes the medium chain triglyercides found in coconut oil.  Coconut oil is one of my favorite pre-run or pre-workout snacks (or before getting started with some housework, heavy duty cleaning or hauling laundry for 5 people up and down the stairs!)  Putting coconut oil in hot coffee is basically just another way to consume it.

A couple years ago I made an effort to become more adapted to using body fat for fuel.  I started by consuming less sugar and fewer refined carbohydrates on a regular basis, and practicing intermittent fasting too.  Today I often exercise first thing in the morning on an empty stomach (or sometimes after a cup of coffee if I’m waiting for the sun to come up) or a chocolate coconut oil cup if I feel a little hungry but want to wait to eat breakfast or my next meal until I’m done exercising.

I use to NEED to eat breakfast shortly after waking, or at the very least I had to have a small snack before a run (like half a banana or a date with nut butter) but this is no longer the case.  Exercising in fasted state is believed to help train your body to burn fat for energy, and fat is much cleaner form of fuel for your muscles than glycogen.  Once you’ve adapted to burning stored fat more efficiently, your body will burn a combination of stored fat and glycogen during exercise and you’re less likely to “bonk” because you’ve run out of muscle glycogen.  Even if/when your body fat percentage is really low, you never “run out” of body fat for energy.

In this way, I use coconut oil as a supplement.  As always, please remember I’m not a medical or sports professional!  This is all my own understanding based on my own reading and experience.  It’s up to you to do your own research and decide for yourself if this is right for you – but if you’re curious to know more, I hope some of those links above will get you pointed in the right direction.

Have you heard of bulletproof coffee?  It’s basically the same thing, except bulletproof coffee is made with butter and sometimes a little coconut oil too.  Even Dr. Andrew Weil agrees that bulletproof coffee made with butter and/or coconut oil can be a worthwhile experiment to see if it’s something that works for you.

How to Make Coconut Oil Coffee

I made a cup of coconut oil coffee yesterday before my morning heated power vinyasa yoga class. I prefer to do yoga 1 – 2 hours after a meal, and since my class was first thing in the morning, a cup of coffee with a little coconut oil was the perfect pre-yoga snack.

You’ll start with a hot cup of coffee.

Coffee Action Shot

And a tablespoon of coconut oil.  I’ve read some recipes that call for 2 Tbsp of coconut oil – but be warned that too much coconut oil at once can cause digestive upset if you’re new to it.  1 Tbsp works well for me.

Coconut Oil for Coffee

Yes, your coffee will have an oil slick – don’t be alarmed.

Coconut Oil Slick

Add a tablespoon or so of half and half or heavy whipping cream (or a 1/2 tbsp of each) and put in the blender.

Coffee in Vitamix

It’s a latte at home!  Coffee in the blender makes some serious foam.

Blended Coconut Oil Coffee Good to the Last Drop

There is a slight hint of coconut flavor to this – but I would say it’s subtle and is not overpowering.  I like coffee without sugar – but if you like your coffee sweet, I would use a calorie free sweetener like stevia (NOT an artificial sweeter!) to avoid releasing insulin, the fat storage hormone.  And if you’re not a coffee drinker, you could definitely replace coffee with hot tea.

Frothy Coconut Oil Coffee

Have you ever put coconut oil in coffee or heard of bulletproof coffee?  Why do you drink it?  What did you think?  Please share your experience for the bulletproof coffee newbies out there!


Please know that links to Amazon are affiliate links. It doesn’t change the price you pay, but if you buy something from Amazon after following one of the links in my posts, I earn a percentage based commission from Amazon as a part of their affiliate program. This is one of the ways I generate revenue from the posts that I write here. I promise that I only link to items that I truly endorse. You don’t ever have to buy anything, but if you do, thank you for supporting the site and the work I do here.


The Fountain of Juice

April 3rd, 2013 | Posted by Alison Spath in Vegetable Lovin' - (4 Comments)

Yesterday was my 34th birthday.  Thirty four.  What a perfectly ordinary age.

Although I think I’m officially in my “mid-30’s” now.  How about “early in my mid-30’s”?  That’s a little easier to swallow.

Getting older isn’t so bad, it’s the looking older part that doesn’t thrill me.  There are more gray hairs sprouting from the top of my head than I can/should pull out now.  I’ve been noticing more fine lines around my eyes lately too.  And there is definitely less distance between the floor and my butt these days.  Hmmm, what other embarrassing things about myself should I admit here?  I think I’ll stop now.

Gray hairs and fine lines aside, my biggest concern about getting older is feeling old – I’m happy and grateful to report that feel pretty dang good.  In fact, I feel better at 34 than I did at 28.  I was 28 when I first noticed that I didn’t have youth on my side anymore.  Achy and tired, I found You: Staying Young.  It was one of the first books I read on my journey to taking better care of myself… maaaybe it’s time to swap the sour patch kids and gummy bears for nuts and berries, eh?

Today, I have no doubt that the key to aging gracefully is found in the way you live your every day life – the answer is not in some age-defying cream or magic bullet infomercial product.  Slow the aging process from the inside out.  Plant foods?  Yes!  Gummy bears?  No.

Wine and dark chocolate?  Well. if you insist… (I insist!)

And so this is the reason I do most of the stuff that I do: to feel young and to look young(ish) for as long as possible.  Real, lasting change won’t happen until you have a reason.  Feeling young is my reason.  (Fitting into my jeans is another.)  And who knew I wouldn’t miss those gummy bears one little bit?

But enough about birthdays and gummy bears, let’s talk about plants!  After lots of green juicing over the past few weeks here, this morning at 34 years and 1 day old, I was feeling ready to think outside the Romaine-Apple-Ginger-Lemon-Cucumber box.

Today a couple of pears, limes and a big ol’ stalk of celery went into the juicer.

Celery Lime Pear for Juice

Some ginger too.  That’s nearly a pound of ginger, but only two little nubs went along with the fruit and celery.

Lots of Ginger Ginger Nubs

So much prettier when it doesn’t have beet greens in it.

Celery Pear Lime Ginger Juice

One for me, the other one was for working-from-home Zak.

Celery Pear Lime Ginger Juice

And a baby in the background!  How appropriate for a post about feeling young.  (He got his own little glass today too.)

Drink vegetable juice and you’ll feel like a baby!  Only three easy payments of $19.95!  No checks or COD’s.  Call now!


Please know that links to Amazon are affiliate links. It doesn’t change the price you pay, but if you buy something from Amazon after following one of the links in my posts, I earn a percentage based commission from Amazon as a part of their affiliate program. This is one of the ways I generate revenue from the posts that I write here. I promise that I only link to items that I truly endorse. You don’t ever have to buy anything, but if you do, thank you for supporting the site and the work I do here.