40 Days of Yoga, Teacher Training and Noticing Jealousy

October 25th, 2013 | Posted by Alison Spath in Healthy Habits - (Comments Off on 40 Days of Yoga, Teacher Training and Noticing Jealousy)

Today marks 28 days into my personal 40 Days of Yoga challenge and things are going well. Most days I try to get anywhere from 10 to 45 minutes of practice in at home, either as self guided practice (that means making it up as I go) or a class from yogadownload.com.  I’ve been getting to the studio once or twice a week for a 75 minute class, and then other days, like last Friday, it was a couple downward dogs and forward bends in my pajamas right before bed because the entire day slipped away before I had a chance to roll out my mat.

Rochester Wall Therapy Feet at Gregory and South Clinton

(This is another painting from Rochester Wall Therapy.  Bare feet felt applicable in a post about yoga.)

Making 40 Days of Yoga Happen

I’ve written about my love for yogadownload before, but I’m really loving this site right now because it’s coming in quite handy with the time constraints of taking care of three kids, homeschooling and running a household.  I bought a three month membership so I could have unlimited access to their huge library of classes and love that I can pick a class based on time, area of the body or level of intensity – it works out well when I don’t have the time to get out for a real class but don’t want to just guide myself through a practice either.  If you’ve never checked out yogadownload, I highly recommend it for both the new and seasoned yogis.  They have tons of free 20 minute classes for you to try without ever having to buy or commit to anything.  Additionally, the classes from yogadownload gave me a chance to see what a real yoga class was like before I ever stepped foot into a real life yoga class, so I had a general idea of what to expect and didn’t feel like a complete noob when I walked through the door for the first time.

(Being a complete noob is totally fine though!  But if you’d like to try a yoga class and your inexperience is leaving you feeling intimidated and therefore keeping you from moving forward, try the free classes from yogadownload to find your groove in the privacy of your own home first!  Or any online yoga class, I’m sure there are lots of other sites that offer a service like this too.)

28 Days In

After four weeks of doing yoga every single day, I am absolutely noticing an incredible difference in my practice.  I feel looser and stronger, there’s less “backsliding” between classes even with just 5 minutes a day if that’s all I have time for.  In class last night I went deeper into a seated forward bend than I ever have before and it left me thinking Are these really MY hamstrings?  I think I picked up someone else’s loose hamstrings by mistake!

My motivation to behind doing yoga for 40 days straight is simple at the surface:  I want to get better at it.  And like Malcolm Gladwell demonstrates in the book Outliers, it takes a lot of time (like 10,000 hours) to get really good at something.  Given there are only 168 hours in a week and I need time to eat, sleep and shop for groceries, there’s no time like the present to continue chipping away at my 10,000 hours.

The Path to Yoga Teacher Training

What lies beneath though is that I don’t just want to get better at yoga, I’m feeling a strong urge to further deepen my practice.  One way that I’m satisfying that urge is with yoga teacher training that began last weekend.  It took me a long time to feel like I was ready for immersion and teacher training (it’s 9 months of intense yoga study and practice!) but I’ve come to see that this is the right path for me.  Sometimes I have a hard time imagining teaching a class, especially to advanced or even intermediate yogis – and then other times I can easily see myself teaching to newcomers or perhaps even prenatal yoga because I believe my own prenatal yoga practice played an important role with my successful VBAC with Kaz.  Honestly though, my primary motivation is not to take on some new career, but to learn more about myself, more about yoga and to feel my way around the spiritual and philosophical framework that yoga provides.

So for the next 9 months, I’ll be immersing myself in yoga with training, reading and practice, practice and more practice.  It’s something I’ve wanted to do for a long time but I never felt “ready”.  When the opportunity presented itself, it felt very serendipitous – the timing was perfect, the tuition fit our budget and class schedule is very workable with our schedule.  (It gets a little intense toward the end, but we’ll make it work!)

And so that’s that!  I’m doing my best to play it cool, but really I’m embarrassingly excited and exceedingly grateful about the whole thing.

What’s Jealousy Got to Do With It?

Whenever you notice a feeling of jealousy, look at it like a road sign that is pointing you toward something that you want.  How many times have you asked yourself or been asked by someone else, “what do you want?” and your answer has been a frustrated or annoyed “I don’t know!?”  If that’s you, stay on the look out for feelings of jealousy.  Recognize jealousy as a road sign that is directing you somewhere.  Notice and then take action as you’re ready and able!

A recent example from my own life came this spring, sitting in the waiting area of a local gymnastics academy, talking with a good friend while our kids were in class.  As a part of our conversation she mentioned she was working on setting up some yoga classes as a part of her yoga teacher training, and my mouth fell open.  I immediately felt jealous – I want to do yoga teacher training!   How many times had I found myself in a yoga class wanting to know more?  What are the teachers thinking when cueing this sequence of poses?  What’s happening in this pose?  Why are we doing it this way?  Teacher training always felt like something that was beyond what I had the time for, and beyond that, I didn’t even know where to start.  It felt like something I might do “some day”.  Some day when I was a better yogi.  Some day when I had more time.  Some day when we had the money for it.  Some magical, mystical day down the road when I felt “ready”.

In the days that followed that conversation with my friend, I realized that my twinge of jealousy meant that this was something I really wanted to do and was important to me.  And then, just as I was starting to look into what “yoga teacher training” meant, my local yoga studio announced that they would be running their first ever teacher training this fall, and my mouth fell open again! That settled it.  This is what I want, the timing is right (or close enough, at least!)  I’m going for it.

Notice Jealousy But Reserve Judgement

If you catch yourself feeling jealous, don’t judge yourself or your feelings – jealousy is a perfectly normal human emotion.  Notice your feelings and then try to figure out what those feelings are leading you toward.  And know too that sometimes jealousy masquerades as something else.  Resentment, anger, thinking mean thoughts, guilt – notice these emotions as well and realize that jealousy is what might be what is behind those feelings.  Let them guide you toward what you really want and some changes you might need to make – even if that change is sloooooowwwwww or could mean a bunch of other changes that have to happen first before you get to the heart of what you really want and what you’re really after.

So go forth and feel jealous!  Or something.  I hope it leads you to the very best version of yourself.


Please know that links to Amazon are affiliate links. It doesn’t change the price you pay, but if you buy something from Amazon after following one of the links in my posts, I earn a percentage based commission from Amazon as a part of their affiliate program. This is one of the ways I generate revenue from the posts that I write here. I promise that I only link to items that I truly endorse. You don’t ever have to buy anything, but if you do, thank you for supporting the site and the work I do here.


Shrimp Ceviche on Salad

October 22nd, 2013 | Posted by Alison Spath in Vegetable Lovin' - (4 Comments)

“Ceviche” is a relatively new word to me.  Wikipedia says ceviche is a seafood dish marinaded in citrus juices – and I’m with ya so far.

But Google Chrome and it’s squiggly red line under the word Ceviche is suggesting I use the word “Crevice”, which is not especially helpful because until just a few moments ago, I wasn’t even sure how to pronounce “ceviche”.  Now I’m going to go to a fancy party some day and say “May I please have the Shrimp Crevice?” and people are going choke on their caviar and/or snort Cristal out their nose.  Thanks for nothing, Google Chrome.

Fortunately, howdoyousaythatword.com taught me it’s pronounced “seh/BEE/tcheh” – which sort of sounds like a cross between French, English and Pig Latin: “C’est B*tch-ay”.

At least now we’ll never forget it.  High five for not saying stupid things at fancy parties!  At least as far as the food talk goes.  No promises on the rest of my conversations.

Really, we should not have to think this hard about what to call this dish.  Can’t we just call this shrimp salad?  That just rolls off the tongue.

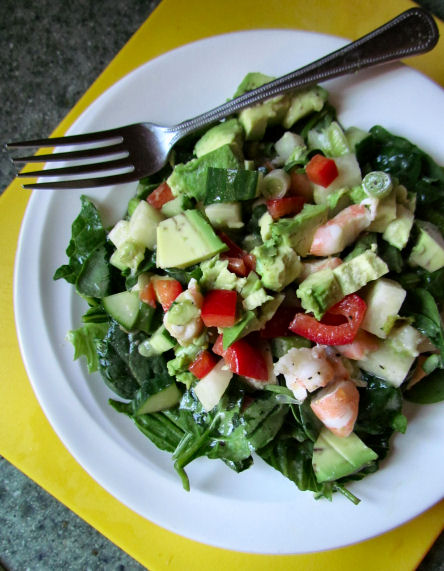
Shrimp Ceviche on Salad

Except, wait, put this ON your tongue, don’t let it roll off.

Shrimp Ceviche

print this recipe

1/2 lb of shrimp, de-veined, tails removed, chopped (I used cooked, frozen, thawed)
1/2 jicama, peeled, chopped
1 bell pepper, chopped (you could also use a spicier pepper here)
1/2 seedless cucumber, chopped
1 bunch of scallions, all of the white and some of the green (not the rooty, hairy bits)
juice from two limes
2 – 3 Tbsp olive oil
salt and pepper

1 avocado*, chopped

Yes, there is a lot of chopping involved with this recipe, but pat yourself on the head and then tell yourself it’s all right – it will all be worth it, I promise.

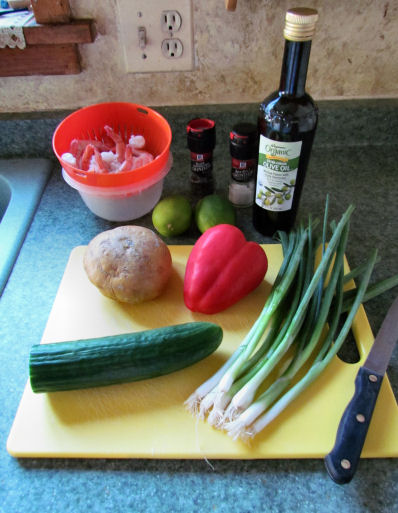
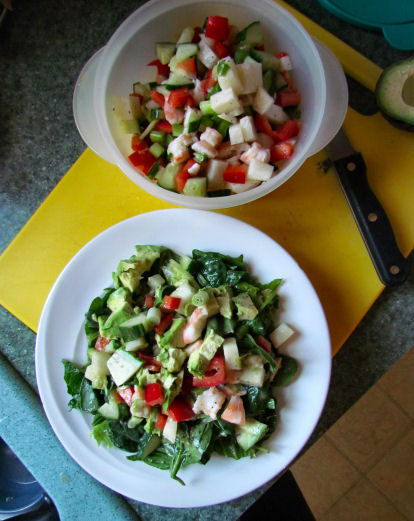
Give yourself about 20 minutes to turn this:

Shrimp Ceviche Ingredients

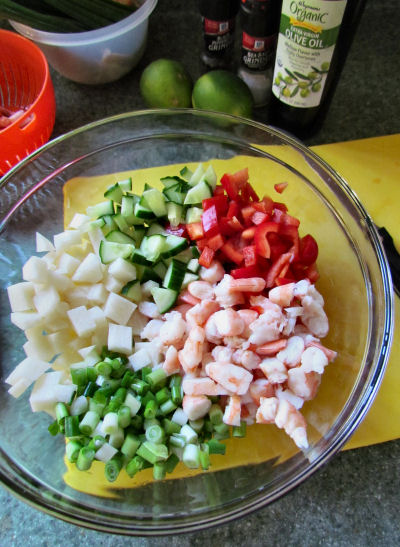
Into this:

Shrimp Ceviche Prep

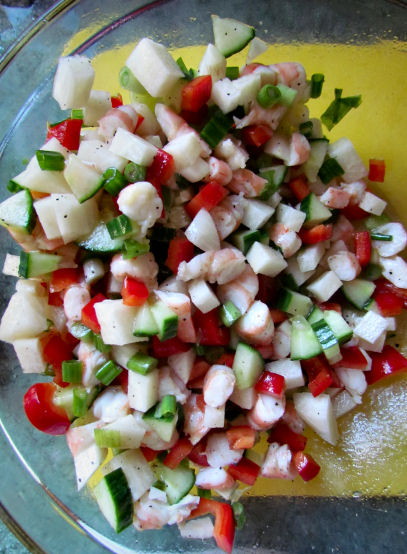
Stir together vegetables, lime juice, olive oil and spices.

Shrimp Ceviche Mixed

*Add the avocado now if you’ll be serving this somewhat soon, otherwise wait to add the avocado until it’s closer to the time you’ll be eating it. The lime juice should preserve the avocado and keep it from oxidizing and turning brown for a little while, but this makes enough to last us a couple days, so I usually wait to add the avocado until right before serving.

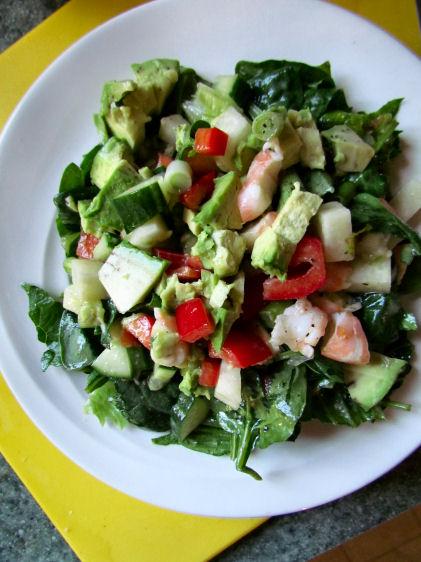
I like to make a big batch and then put it away to eat over the course of a few days – the flavors continue to blend nicely as it marinates.  You can put this on toast, serve it as an appetizer at your fancy (or not-so-fancy) party or do what I do, put it on salad greens and eat it for lunch.  Or better yet, breakfast.

Shrimp Ceviche

Paleo and low carb but who cares, it’s delicious!

Paleo Low Carb Shrimp Ceviche on Salad

We love this dish and I hope you will too. C’est ummy-ay!


Please know that links to Amazon are affiliate links. It doesn’t change the price you pay, but if you buy something from Amazon after following one of the links in my posts, I earn a percentage based commission from Amazon as a part of their affiliate program. This is one of the ways I generate revenue from the posts that I write here. I promise that I only link to items that I truly endorse. You don’t ever have to buy anything, but if you do, thank you for supporting the site and the work I do here.


Make Your Own Kimchi

October 17th, 2013 | Posted by Alison Spath in Vegetable Lovin' - (11 Comments)

We discovered kimchi about 3 years ago, thanks in part to The 4 Hour Body (a gimmicky book but some aspects were informative and entertaining nonetheless.)  Kimchi is an Asian dish – it’s a spicy, sour fermented cabbage. Fermented foods like yogurt, sauerkraut, real pickles (and kimchi!) are an important part of your diet (have I convinced you read Deep Nutrition yet?  Come on people!)

With that, store bought kimchi (or kim chee) seems to fall under one of two categories:

Category 1: Not that good.

Category 2: Not that cheap.

(Last time I looked, the kimchi at Wegmans is $5 for a pint jar and falls under Category 1.  The kimchi at my local hippie food co-op is better, but at $8 a jar – it falls under Category 2 and is a rare treat.)

The good news is you can make kimchi yourself!  Even better news, my mother has been making it for months now and has her recipe totally nailed down.  She’s been bringing us jars of her homemade kimchi and we devour it in an embarrassingly short period of time.  Of the last jar she brought us, Zak described it as being so good he swallowed it whole before he remembered we’re supposed to chew it.

But the best news of all, homemade kimchi is in a category all it’s own: REALLY GOOD and PRETTY DANG CHEAP!

Recipe to Make Your Own Kimchi

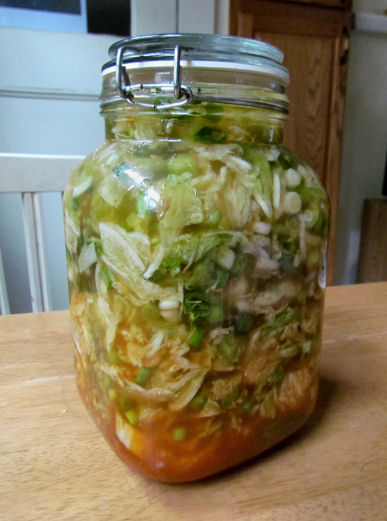
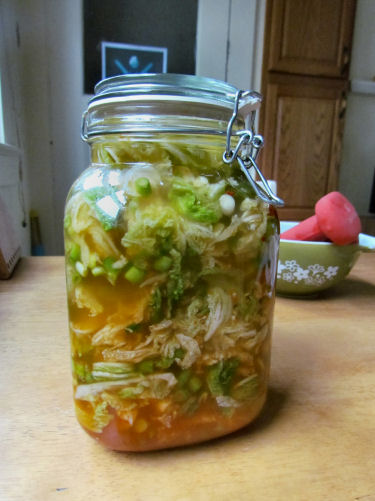
For my birthday (ummm, back in April) my mom brought me a jar that looked a lot like that one pictured above, with her recipe and instructions tucked neatly into my birthday card.

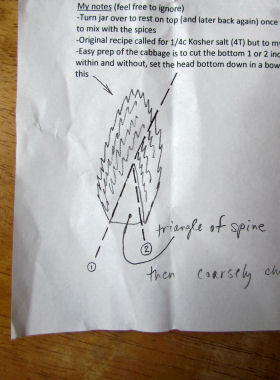
Kimchi Recipe and Instructions Directions for Cutting Out Spine

Despite loving her recipe, I have totally been dragging my feet making kimchi myself.  I don’t know why, it just felt like a huge… project.  This was something new, and anything “new” means I’m going to need time to think!  Thinking?  Ain’t nobody got time for that!  I mean there are all these steps and spices and crazy ingredients (like fish sauce!  What the hell is fish sauce?  Where do I find FISH SAUCE?  What am I supposed to do?  Ask someone?  Thinking and asking!  This is getting too complicated.) and then there’s the fermentation part and OMG you mean I have to cut up this big unruly head of cabbage and dear-god-this-feels-like-a-lot-of-work-I’ll-just-let-mom-bring-me-another-jar.

Fortunately, I stopped being such a whiny kimchi excuse maker and finally got my act together – and I’m so glad I did!  Because this kimchi is fantastic and now that I’ve done it a couple times I’m a Crazy Kimchi Making Machine.

So dear friends, happy (early/late/right-on-time) birthday To YOU!  From me.  And from my mom.

Here is my mama’s kimchi recipe with some step by step photos of the process, because that’s what I do.

Granny Weed’s Kimchi Recipe

click to print and tuck neatly into your birthday card from me (I will just need you to sign my name.)

Ingredients

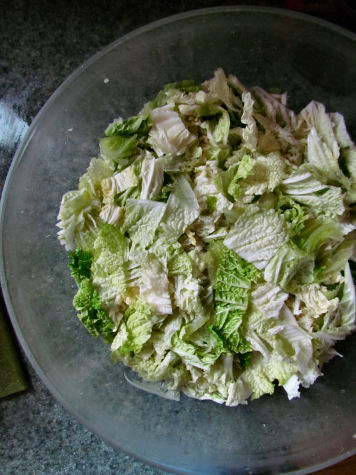
2 Large heads Nappa cabbage, washed, spines removed, coarsely chopped
2 Tbsp Kosher salt
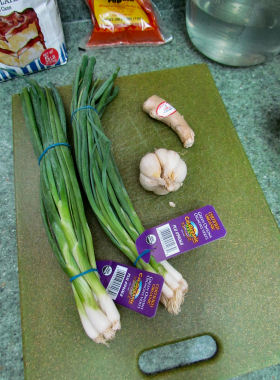
1 or 2 bunches of green onions, all of the white and part of the green, sliced
2+ Tbsp minced fresh garlic
2+ Tbsp grated fresh ginger
1 – 2 Tbsp ground, dried chili pepper (Korean or Mexican varieties will work, use less if you don’t like heat!) NOT chili powder 
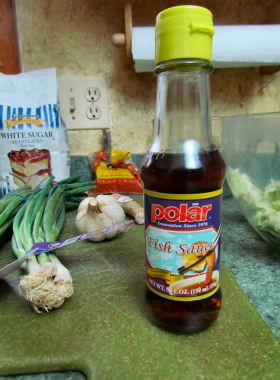
2 Tbsp fish sauce (optional for vegetarians)
1 tsp sugar
6 cups of water

Instructions

In a very large bowl, dissolve the salt into the water.
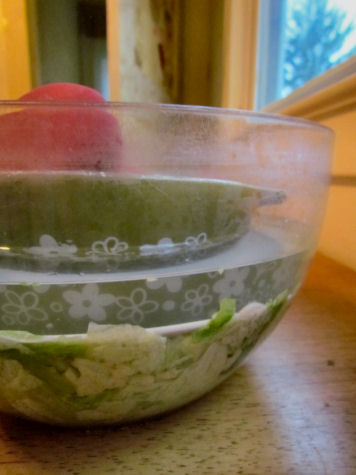
Add prepared cabbage to water, cover with a plate, a bowl on the plate and put a weight into the bowl to push the cabbage down.
Soak for at least 10 to 12 hours.
Drain the cabbage and reserve the salt water that it was soaking in.
Mix together the onions, garlic, ginger, chili pepper, optional fish sauce and sugar.
Add the mixture to the drained cabbage and mix well.
Stuff the cabbage mixture into a 2 quart jar.
Fill with the reserved salt water to the top of the jar.
Cover and allow to ferment at cool room temperature for 2 to 3 days.
Store in the refrigerator for up to 3 months (if you have any left!)

Notes

Gently turn jar over and back a couple times during the fermentation process to ensure all cabbage continues to mix with the spices.
Easy prep of the cabbage is to cut the bottom 1 or 2 inches off the head, hold together while rinsing within and without, set the head bottom down in a bowl and remove leaves one by one.

And now here comes the step by step photos, to show you that while yes, making kimchi is a bit of a project, it’s nothing you need to drag your feet over.  (P.S., you’ll find fish sauce in the ethnic food aisle, I found with the Asian foods.)

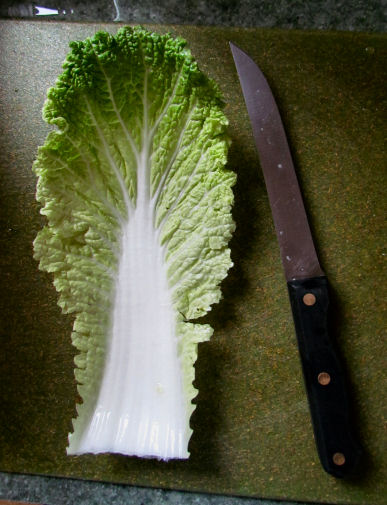
Let’s call this Phase 1 of the Kimchi Making Project.  If you scroll back up and look at the diagram on the recipe from my mother, you’ll see how to easily remove the spine from nappa cabbage leaf.  The lack of cabbage spines is one of the things that makes this homemade kimchi so good, but this step is optional.

Nappa Cabbage Leaf

You’ll end up with more kimchi if you leave the spine in – but I’ve been cutting the biggest, thickest pieces out.

Cut out Nappa Cabbage Spine

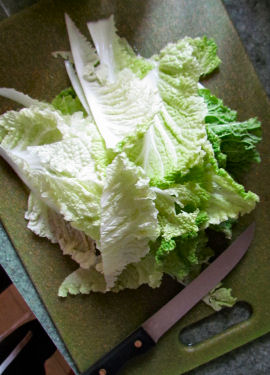
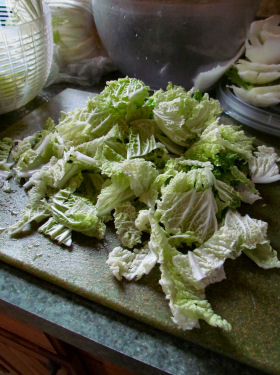
With your pile of trimmed nappa cabbage leaves, chop into bite sized pieces,

Pile of Nappa Leaves Chop Nappa Cabbage into Bite Sized Pieces

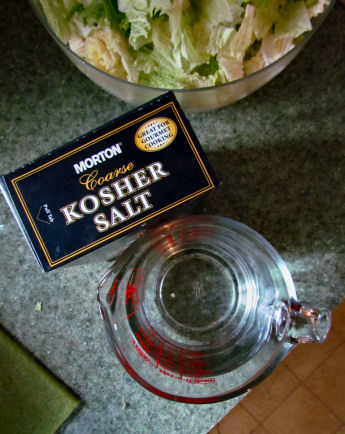
and then cover with your salt water brine.

Salt Water Brine for Kimchi

Geez, how hard was that, lady?

Cabbage and Brine

Not that hard.  (*hangs heads*)

(I actually timed it and it took me about 10 minutes to cut up two heads of nappa cabbage with most of the spines removed.  Phase 1 is probably 15-20 minutes from start to finish.)

From there, you’re just a bowl and a plate and some hand weights away from being done until tonight or tomorrow morning (whichever is 10-12 hours later.)

Weights for Kimchi

Put your hand weights in a bowl, otherwise they’ll be swimming in salt water brine in the morning.  (I care more about my cabbage than I do my weights.)

Water Level Will Rise

When your cabbage has been sufficiently pressed, it will be time to move on to Phase 2.  Cutting up a few more vegetables (but you’ve had a 12 hour break so you’ll be rested and ready!) and mixing some spices.

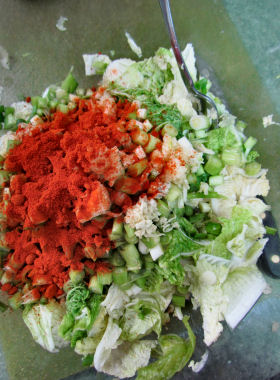
Green Onions Garlic Ginger for Kimchi Fish Sauce for Kimchi

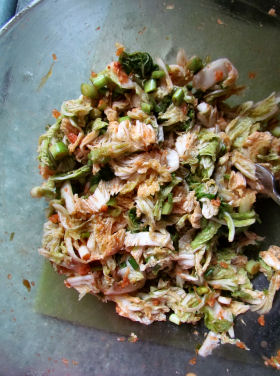
Drain your cabbage but reserve the brine.  Chop a bunch of green onions, mince some garlic and grate some ginger.  Fish sauce, chili pepper, sugar and a splash of your reserved brine:

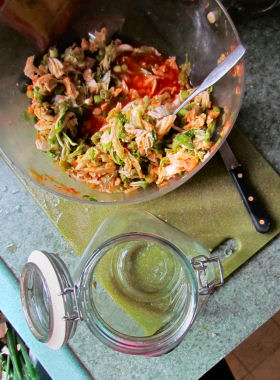
Kimchi with Vegetables and Spices Kimchi with Vegetables and Spices

Use the as much brine as needed to fill your air tight jar to the very brim.

Jar for Kimchi Fill to Brine to Remaining Brine

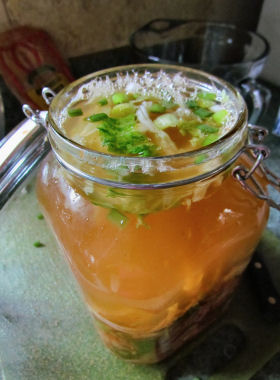
KAPOW!  We’re moving on to Phase 3, baby!  It’s fermentation time.

Kimchi Ready to Ferment

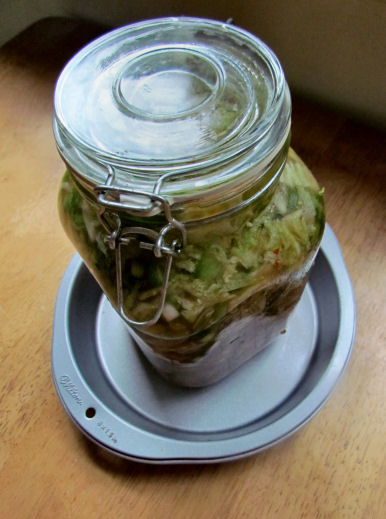
You’ll want to put a pan under your jar because as cabbage ferments it will release gas (excuseme) and some liquid will be forced out of the jar.

Put Kimchi Jar in Pan

The oozing is fine, and it’s also a good sign that it’s working!  I’ve been “burping” my jar a couple of times during the 2 – 3 day fermentation process because I’m a little paranoid it’s going to explode.  I’ve been allowing my kimchi to ferment in my dark, cool(ish) pantry.

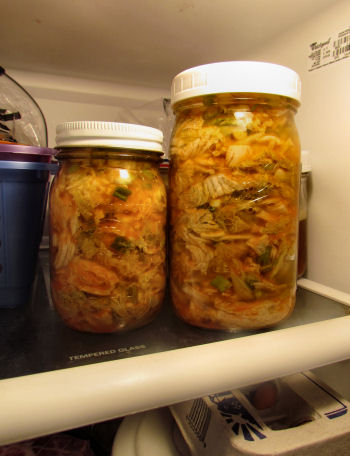
2 – 3 days later, transfer kimchi to jars and store in the refrigerator.

Homemade Kimchi Ready to Eat

(Wait to dig in until it’s cold!)

OK, now it’s your turn!  Do you eat kimchi?  Do you make kimchi?  Do you want some kimchi?  Do you say “kimchi kimchi koo!” when you tickle a baby?  Are you intimidated by new food projects? Is today your birthday?  Tell me!

I’m off to have kimchi for breakfast.


Please know that links to Amazon are affiliate links. It doesn’t change the price you pay, but if you buy something from Amazon after following one of the links in my posts, I earn a percentage based commission from Amazon as a part of their affiliate program. This is one of the ways I generate revenue from the posts that I write here. I promise that I only link to items that I truly endorse. You don’t ever have to buy anything, but if you do, thank you for supporting the site and the work I do here.


Cholesterol Clarity

October 15th, 2013 | Posted by Alison Spath in Good Reads - (1 Comments)

Cholesterol Clarity was written by Jimmy Moore of Livin’ La Vida Low Carb (nice!) and was co-authored by Dr. Eric Westman, MD at Duke University, as well as a long list of contributing experts.

Cholesterol Clarity by Jimmy Moore

Let me start by saying that I don’t have concerns about my cholesterol, but I have a couple of family members who do and are on statin medications to bring their cholesterol levels down.  One of those family members would be my loving father who I cherish and adore.  He and I talk about nutrition a lot and I’m very grateful that he’s open minded and is willing to listen to his Bossy Pants Nutrition Nut daughter who will happily rattle on and on about what I’m currently reading, how I’m eating and what I think he should be eating too.

Just a brief look through this blog of mine will make it pretty obvious I’m not concerned with the cholesterol and saturated fat found in eggs, real butter, coconut oil, full fat dairy products and many of the other foods that conventional dietary wisdom has told us to avoid.  I believe these foods are good for us and cholesterol is a necessary nutrient for good health.  But what about someone who has heart disease and high cholesterol?  Can they safely eat eggs?  What about butter?  Do you need to be mindful of your saturated fat and cholesterol intake if your cardiovascular health is already compromised?  What is the cause of high cholesterol?  What do all these numbers really mean?

After listening to Jimmy Moore talk about his new book on the Balanced Bites podcast (episode #101) this summer, I realized Cholesterol Clarity probably had some answers to the questions I had about real food when it came to heart health.

This is a book review, but it’s not a book report.  I’m not going summarize what I read because that would be boring and because I’m still wrapping my head around all of this new-to-me information.  If you were sitting here with me in my living room (I’m currently sitting on an exercise ball, I’ve got one for you to sit on too) and you asked “What did you think about this book?”, my response would depend on what your situation is and what your goals are.

I would at least tell anyone who asked (sitting up straight with my hands folded neatly in my lap):

“Cholesterol Clarity has helped me understand that the real “bad guy” with heart disease is not cholesterol but inflammation.  Excess lipoproteins in the blood are not from dietary fat, but are the result of too many carbohydrates.  Inflammation comes from a ratio of Omega-6 to Omega-3 that is too high (that is, a diet full of processed foods, trans fats and vegetable oils – AKA, The Standard American Diet.  But even if you think you eat well you could still be eating too much Omega-6!  Almond Butter, I am looking at you.)

I would also tell you that this book is easy for the layperson to understand and was an enjoyable read.  I might also blurt out something like, “did you know there was a study released in 2009 that showed 75% of people who showed up at the hospital with a heart attack had normal cholesterol levels?”  (i.e., cholesterol lowering meds aren’t necessarily going to save you from a heart attack!) and I might also geek out on what I learned about the positive role that cholesterol plays in our health and all the awesome, important things cholesterol does for us.

From there I would want to know which of these describe you:

Do you have high cholesterol or are you worried about someone who does?

Read this book.  Consider the lifestyle changes Jimmy Moore and all his experts recommend.  There are lots of dietary and lifestyle choices you can make that can positively effect your cholesterol levels – and know that high cholesterol isn’t necessarily a bad thing.  There are lots of things you must consider when looking at your cholesterol numbers and this book will help you figure that out.

And if you’re worried about someone with high cholesterol, let’s say this out loud together right now:  The only person you can change is yourself.  Share knowledge with interested people, let everybody else ask for advice when/if they want to know more.  I’m about to pass this book on to my dad, only because he’s willing and interested.  If he wasn’t, I would shut the hell up and just send him more pictures of his grandchildren.

Do you have heart disease?

Read this book.  Consider the lifestyle changes Jimmy Moore and all his experts recommend.  Start digging deeper into the research this book points to.  Educate yourself so you can make informed decisions.

Does heart disease run in your family or do you have concerns about your heart health?

Read this book.  Consider the lifestyle changes Jimmy Moore and all his experts recommend.  Be proactive now instead of reactive later.

Me?  I’m Livin’ La Vida Low Carb.

Cholesterol Clarity reaffirmed for me that a low carbohydrate diet is the way to go.  That doesn’t mean NO carbohydrates – it means I’m going to continue to keep bread and grain consumption to a minimum.  It means eating more vegetables than fruit.  It means keeping sugar intake as close to zero as I can most of the time.  This has been a work in progress for years now, and I go through phases where I do better and phases where I don’t.  Don’t beat yourself up if it takes you a while to break old habits and find a new “normal” with the way that you eat if this is what you choose to do for yourself and the people you feed.  Lasting change takes time.

I also want to explain that I’ve had issues going too low carb in the past.  I could do it for a while, but after a few days would start to feel wonky.  (That’s a scientific term.)  Wonky = low on energy, light headed, constipated (sorry) and unsatisfied – I didn’t understand how all these Paleo people I’d been reading about could do it.  I’d heard of the low carb flu but “hanging in there” just wasn’t cutting it for me.  Something felt WRONG and so I would go back to eating more carbs in the form of fruit, Ezekiel bread, oats, the occasional cookie or treat, etc.

I’m finally figuring it out thanks to another book I was lead to by the co-author of Cholesterol Clarity – New Atkins for a New You (let me spoil the ending:  Dr. Westman explains that going low carb can throw off your electrolyte balance, which is the cause of many of those symptoms I just described, and not a cause of going low carb itself.  Adding more salt and potassium to my diet has solved the first three issues on my wonky list!  Salting your food to taste isn’t enough, I’ve been making my own “sport drink” with salt and lime juice and drinking more bone broth.  Making sure I’m getting enough dietary fat has fixed the satiety and satisfaction part.)

Even though I’m reading an Atkins book I’m not “doing Atkins”, but the low-carb guidance and troubleshooting has been invaluable to me.  I’m convinced of the importance and benefits of a low carb lifestyle thanks to The Primal Blueprint by Mark Sisson, Deep Nutrition by Dr. Catherine Shanahan, The Paleo Solution by Robb Wolf, The Paleo Coach by Jason Seib.  I’ve flipped through Everyday Paleo by Sarah Fragoso and Practical Paleo by Diane Sanfilippo, I trust what these people have to say and I get it!  I want to drink the sugar free Kool-aid and now I’m finally working the kinks out.  I hope to write more about all the great things that come from a low carb, high fat diet in a future post (no cravings, feeling full and satisfied for long stretches of time, lots of energy, effortless weight loss).  If you want to know more and I forget to write about it, remind me!

That’s a nice way to lead into the next book on my radar (I’m #9 on the waiting list at the library), Grain Brain, another book I can’t wait to devour after listening to Dr. David Perlmutter on the Everyday Paleo podcast episode #57.  Good stuff.

The Bottom Line.

Cholesterol Clarity does not have all the answers, but it’s a great place to start.  Know that prescription meds with all their costs and health risks do not have to be your fate, there are a lot of things you can do and try that could save you from sending a cocktail of pharmaceuticals through your liver.

And no matter what, don’t put your faith in any one person or what they have to say.  Keep reading!  Read, read and then read some more.  Take responsibility for your own health, consider lifestyle changes, chip away at it piece by piece and you’ll figure out what works for you.  I’ll shut the hell up now.


Please know that links to Amazon are affiliate links. It doesn’t change the price you pay, but if you buy something from Amazon after following one of the links in my posts, I earn a percentage based commission from Amazon as a part of their affiliate program. This is one of the ways I generate revenue from the posts that I write here. I promise that I only link to items that I truly endorse. You don’t ever have to buy anything, but if you do, thank you for supporting the site and the work I do here.


Caveman Fajitas

October 10th, 2013 | Posted by Alison Spath in Dinner Time - (5 Comments)

Even though I’m not participating in a 40 Day Paleo Challenge, I’m still cooking for someone who is – so for the time being, I’m making dinner like any good cave woman would.

Namely, low-carb/grain free chicken fajitas.  Just call me Wilma Flintstone.

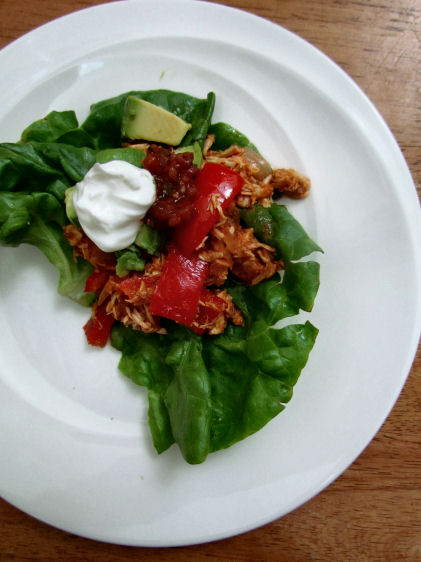
Paleo Chicken Fajitas

Lettuce as a our tortilla was the only thing I did differently to make these chicken fajitas Paleo friendly.  You could obviously use a regular flour tortilla here in place of lettuce if that’s what floats your boat.  (And if you can float a boat with flour tortillas, you must tell me and we will alert the National Academy of Physics!  Or whoever is in charge of gravity, momentum, centrifugal force, etc, etc.)

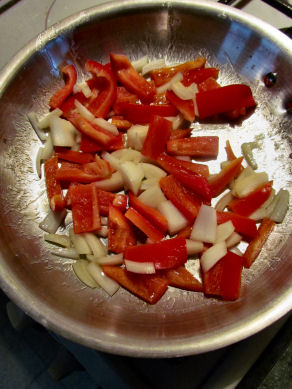
With a big ol’ head of Boston bibb lettuce in one corner of your kitchen, slice up a red pepper and onion and saute in the cooking fat of your choice.  I like real butter or coconut oil, but I’m guessing that Betty Rubble probably used Dinosaur Lard.

Boston Bibb Lettuce for Fajita Wraps Red Pepper and Onion in Butter

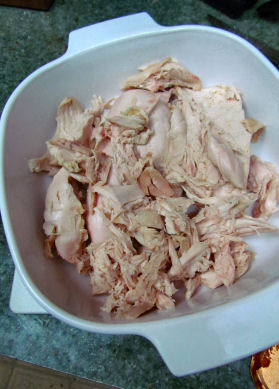
When the peppers and onions are soft, add diced, pre-cooked chicken breasts (mine came from a whole chicken that I’d roasted that morning) to the pan with a simple homemade fajita sauce, if you prefer to save yourself from any funky ingredients that come in packaged sauces 0r seasoning packets.

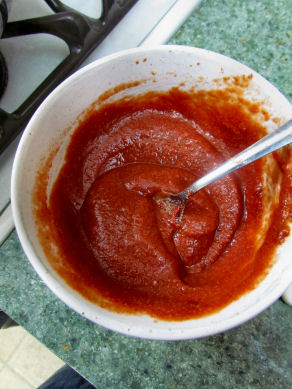
Cooked Chicken Homemade Fajita Sauce

A Very Simple Fajita Sauce

2 Tbsp tomato paste
2 Tbsp apple cider vinegar
1 tsp ground cumin
1 tsp garlic powder
1 tsp salt
dash of chili powder
crushed red pepper to taste (if you like it spicy!)
1 c water or chicken broth, more as needed

I let the chicken and vegetables simmer (covered) in the sauce for about 15 minutes (stirring occasionally and shredding chicken a little as it cooked) while prepping our lettuce tortillas and dicing up an avocado.  It was then time to call Fred Flinstone and Bam Bam to the table.

Paleo Low Carb Chicken Fajita Fixings

Yabba Dabba Do!

Paleo Low Carb Chicken Fajitas

That’s a blob of greek yogurt on mine, in case you’re wondering.  (Paleolithic people can leave that off.  Non-Paleolithic people, consider adding some shredded cheese too!)

This dinner was really good, just a little messy – I might try romaine lettuce next time to see if it holds up better.  If the idea of using lettuce as a wrap feels a little ludicrous to you, let me say that it’s not much different than eating a chicken fajita salad.  With the right seasonings and toppings, you won’t even notice the calories and carbs you’re saving, you’ll be too busy devouring this classic, prehistoric meal!


Please know that links to Amazon are affiliate links. It doesn’t change the price you pay, but if you buy something from Amazon after following one of the links in my posts, I earn a percentage based commission from Amazon as a part of their affiliate program. This is one of the ways I generate revenue from the posts that I write here. I promise that I only link to items that I truly endorse. You don’t ever have to buy anything, but if you do, thank you for supporting the site and the work I do here.


Zak’s been talking about doing a “40 Day Paleo Challenge” for a couple of weeks now and he’s invited all of his (Facebook) friends to join him.  He asked me to write up a brief guide to Paleo for anyone who wants to play along, and when I was putting it together I decided to extend the invite here to you too.  It’s not a contest or competition, just an opportunity to try the Paleo lifestyle for 40 days, to give it a fair shot and to see if it might make a difference for you.

If you’re interested, I’ve got a couple of thoughts.  (Take’em or leave’em or tell me to shove it – your choice.)

1.  If you already eat, move and live pretty well OR if you love a good challenge and the idea of giving up bread for 40 days* doesn’t make you want to run screaming into the night, then by all means – go Paleo!**

Obligatory disclaimer: talk to your trusted health care professional before making changes concerning your health.

2.  If your diet, fitness level or health isn’t where you want it to be right now, my advice is to go slowly.  Commit to spending the next 40 days simply learning more about what means to be Paleo and trying out some of the principles behind the Paleo lifestyle.  (There are lots of links and resources in the little guide above.)  You can try it without completely overhauling your entire life – too much change at once often leads to burn out!  If you want to make changes that are sustainable, give yourself lots of time and space to ease into it.  Be gentle and forgiving with yourself – focus on progress, not perfection.

This picture is my segue into my own little 40 day challenge, and maybe to your own personal challenge if you don’t give a rats ass about going Paleo.

Rochester Wall Therapy River Path

(You can click the image to enlarge it to get a better look, it’s one of many paintings around Rochester that are a part of the Rochester Wall Therapy project, more on that here.)

I saw this last week while riding my bike to yoga, and given I’ve already done 11 weeks of fairly strict Paleo, I’m going to practice yoga every single day for the next 40 days.  I actually started last week (today is Day 8!) and have noticed a difference in my practice already.  I’ll write more about my own little yoga challenge soon.

So what if you’re not interested in going Paleo?  (Or doing yoga?)  Then how about 40 days of doing whatever challenges you?  40 days straight of eating something green.  40 days of drinking nothing but fresh juice.  Commit to going for a walk every day for the next 40 days, even if some days all you have time for is 10 minutes.   40 days of flossing your teeth.  40 days with no soda.  40 days of mediation.  40 days tracing your hand and coloring it like a turkey.  (40 days from now puts us right before Thanksgiving in the U.S. – think of all the decorations you’ll have!)  Maybe 40 days using 40 exclamation marks!!!!!!!!!!!!!!!!!!!!!!!!!!!!!!!!!!!!!!!!  Or 40 days of using no exclamation marks.

40 days could be just what you need to form a new habit.  (Or maybe 21 days is all you need!)  Now please scroll back up and read my disclaimer one more time.

Zak’s Paleo challenge starts today!  (Uhh, sorry for short notice.)  If you’ve already had toast/oatmeal/Pop Tarts for breakfast today, no problem, you can start tomorrow!  Or start next week if you need more time to prepare yourself.  Pick a day to start and just start!

* – by request of one Zak’s friends, the rules of Zak’s 40 Day Paleo Challenge say you get one “cheat meal” per week

** – also by request, you could also go Primal for the next 40 days.  Primal is basically Paleo, but is a little more lenient with dairy.

Think about it.  If you decide on something and want to make a formal declaration of your intentions (big or small!) for the next 40 days, slap it into the comment box below.  Or paint it on a wall and call it “therapy”.  Whatever floats your boat!!!!!!!!!!!!!!!!!!!!!!!!!!!!!!!!!!!!!!!!


Please know that links to Amazon are affiliate links. It doesn’t change the price you pay, but if you buy something from Amazon after following one of the links in my posts, I earn a percentage based commission from Amazon as a part of their affiliate program. This is one of the ways I generate revenue from the posts that I write here. I promise that I only link to items that I truly endorse. You don’t ever have to buy anything, but if you do, thank you for supporting the site and the work I do here.


Chewy Pumpkin Granola

September 29th, 2013 | Posted by Alison Spath in Vegetable Lovin' - (Comments Off on Chewy Pumpkin Granola)

I’ve got another pumpkin recipe today, but please don’t be annoyed.  I promise that I’m about to lay off the orange stuff for a while to ensure my hands stay on the paler side of normal this season.

I’ve had a hankering for granola, but every time I look at the ingredient list on the packages in the store and then look at the price, I sigh dramatically, throw my head back with my forearm over my brow and cry “Why, Granola?  WHY?”  (and then I look around the granola aisle and say “who said that?  people in this store are crazy!”)

Dramatics aside, grocery store granola has too many ingredients and costs too much much money.  We can make it cheaper and better at home, so let’s do that.

I’ve never made granola with squash, but I figured such a thing probably existed and I wasn’t nuts thinking that it could work.  With some extra pumpkin in my fridge after another (half) batch of Pumpkin Muffins, I decided to throw pumpkin seeds to the wind and give it a whirl.  I was really happy with the way this turned out and ate pumpkin granola for breakfast all week without any sighing, head throwing or talking to myself.
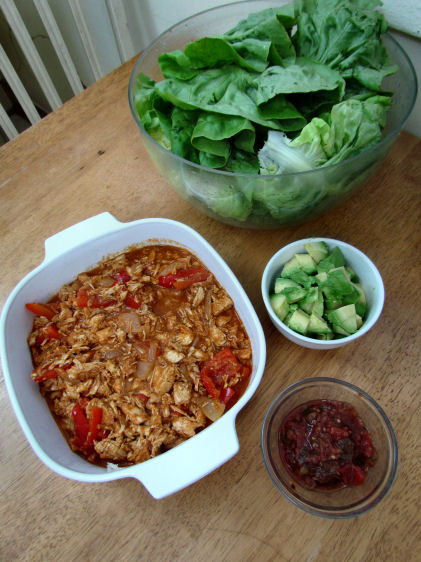
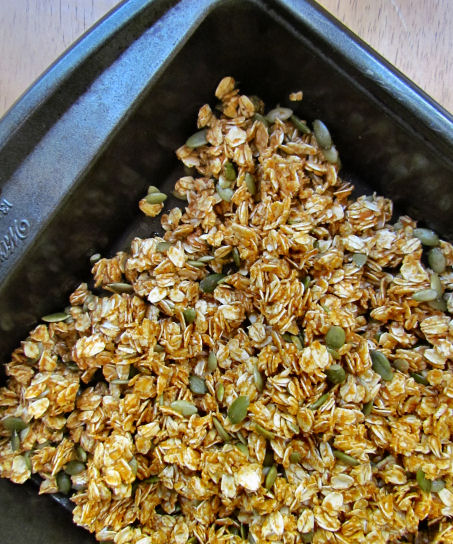
Baked Pumpkin Granola

Chewy Pumpkin Granola

2 Tbsp butter or coconut oil, melted
1/2 c canned pumpkin
1/4 c maple syrup (more or less to taste)
3 c rolled oats
1/2 c pepitas (pumpkin seeds)
dash of cinnamon, ginger, cloves*, nutmeg, salt

Combine butter, pumpkin, maple syrup and spices.  Stir in oats and pepitas until well coated in the pumpkin mixture.

You can replace the pepitas with sliced almonds, walnuts or pecans, but the pepitas were a nice addition and something I’ve never used in granola before.  Plus, pumpkin seeds in pumpkin granola?  I mean COME ON!

*take it easy on the cloves or leave this spice out all together – Zak said this tasted too much like licorice for his liking.  (Actually I believe his exact words were: “what is wrong with this?” and then my exact words were: “ahahahahahaha more for me!”)  I don’t mind the taste of cloves, but you might!

Pumpkin Granola Ingredients

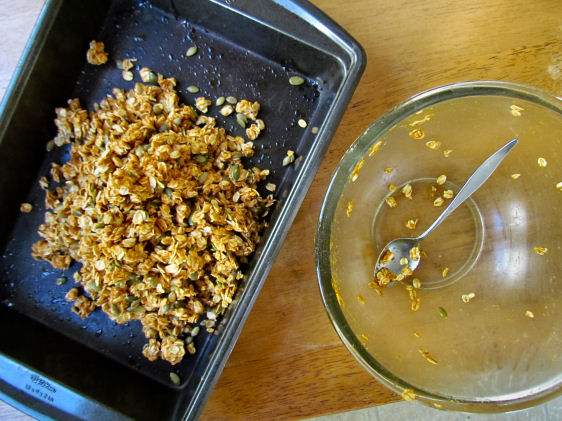
Pre-heat oven to 300.  Spread granola mixture out on in a baking pan or on a cookie sheet, bake for 30 – 35 minutes, stirring once at the half way mark.

Soft Pumpkin Granola

This is soft and chewy, as opposed to Maple Pecan Granola that is more crunchy.  I liked the texture (but I also like clove spice, so take that for what it’s worth) and the chewiness of the pepitas matched the chewiness of the granola, which is another reason to go with pumpkin seeds for this recipe.

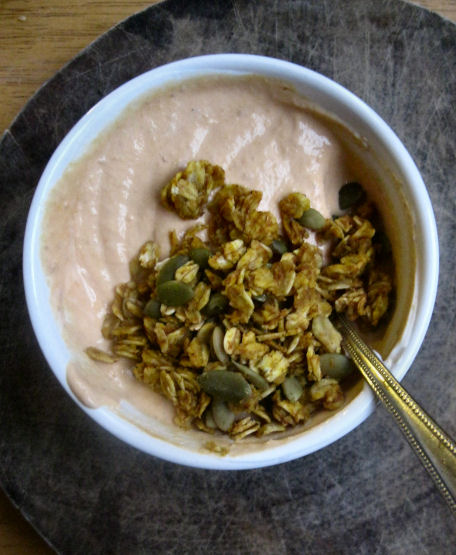
If you’ve still got extra pumpkin laying around after making granola, you can stir a little into your plain or vanilla yogurt to further assist in giving your hands a healthy orange glow.

Pumpkin Yogurt with Pumpkin Granola

(Pumpkin in yogurt is good!  Try it!)

Eat this for breakfast.  Eat this for a snack, like trail mix.  Eat this while looking at the palms of your hands and tell people that you’re watching the orange spread from your wrist to your finger tips before your very eyes.  If you like it when people think you’re crazy, this last option is especially helpful at keeping up appearances.


Please know that links to Amazon are affiliate links. It doesn’t change the price you pay, but if you buy something from Amazon after following one of the links in my posts, I earn a percentage based commission from Amazon as a part of their affiliate program. This is one of the ways I generate revenue from the posts that I write here. I promise that I only link to items that I truly endorse. You don’t ever have to buy anything, but if you do, thank you for supporting the site and the work I do here.


Pumpkin Muffins (Version 2.0)

September 25th, 2013 | Posted by Alison Spath in Short or Sweet - (4 Comments)

Here we go.  The season of Everything Pumpkin has arrived.  Are you ready?  Do you have your pumpkin game face on?  Pumpkin pie!  Pumpkin spice lattes!  Pumpkin lasagna!  (Pumpkin lasagna?)  I’m even ready to declare September “National Pester Your Mother to Make Pumpkin Muffins Month” because that’s exactly what my kids have been doing: pestering me to make pumpkin muffins.

OK gang, I’m ready.  Let’s do this.

When I looked at my pumpkin muffin recipe from a couple years ago my first impulse was to cut down on the amount of sugar the recipe calls for – but I knew I had to tread carefully.  I’ve come to learn that it’s best not to mess with success.  If something tastes even slightly weird or different, complaints will be filed, protests will be made, pumpkin muffins will not be eaten.

(Our next homeschooling lesson will be called First World Problems.  The lesson formerly know to our generation as Don’t You Know There Are Starving Children in Africa?)

I am delighted (and honestly a little surprised) to report that I successfully got away with pumpkin muffin murder!

Well, not murder.  Just less sugar.  And less flour and more pumpkin too.  Although I suppose a pumpkin did die in order for me to make these muffins.  Now I’m a little sad.  Please pass me a muffin.

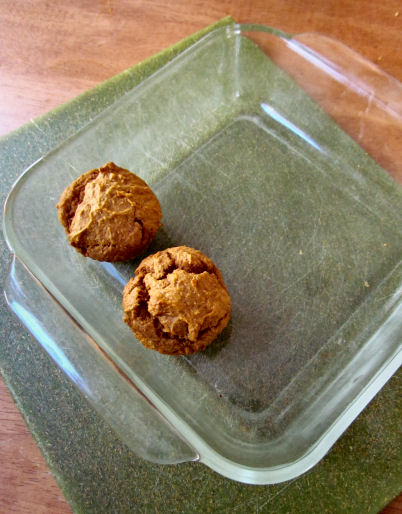
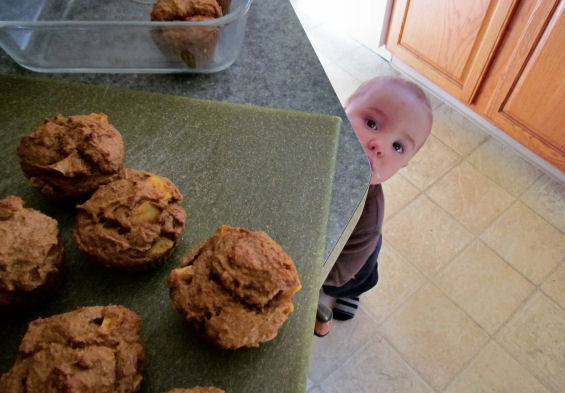
What’s not sad is how quickly these muffins are disappearing!  Given that the muffins you don’t see here were gone before I could even wonder about getting my camera out should tell us all that no one really noticed anything was different.

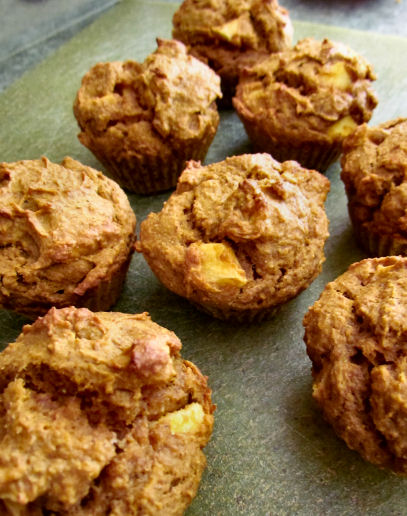
Pumpkin Muffins with Less Sugar

These do have some sugar, but less than they have in the past.   These turned out perfectly sweet and enjoyably dense, this is officially my new go-to Pumpkin Muffin recipe.

Pumpkin Muffins v2.0

print this recipe!

29 oz canned pumpkin (the BIG can!)
4 eggs
2 ripe bananas, mashed
1 c butter, melted
1/2 c milk or water
3 c flour
1 c sugar
2 tsp baking soda
1 1/2 tsp salt
1 tsp cinnamon
1 tsp nutmeg
1/2 tsp ground cloves
1/4 tsp ground ginger

(optional 2 – 3 apples, peeled and cubed.)

Pre-heat oven to 350. Grease and flour 2 bread pans or line muffin pan with muffin tins.

Mix together pumpkin, eggs, butter, sugar and banana until smooth. In a separate bowl, whisk together dry ingredients and slowly stir into wet ingredients and pour into prepared pans. Muffins (filled with 1/4 c batter) will be ready in 20 to 25 minutes. Bread will be done in about 50 minutes.

The quantities above made nearly 2 dozen muffins AND 1 loaf of bread.

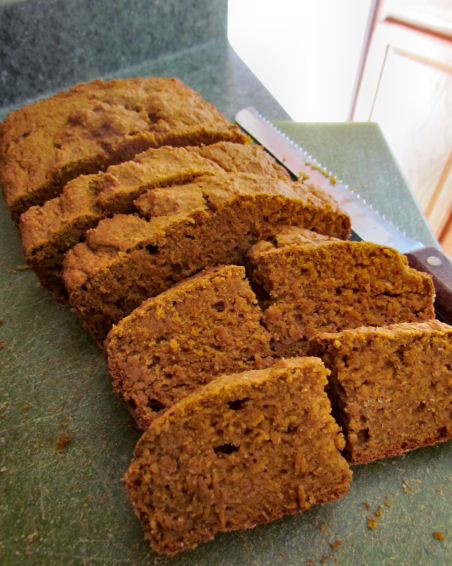
Pumpkin Bread with Less Sugar

This is a lot of baked pumpkin goodness, you can definitely cut this recipe in half as needed.  But if you’re feeding a crew of kids or going to a pot luck, it’s nice to have a bunch on hand.

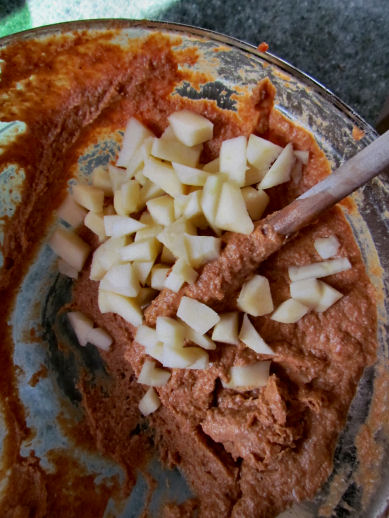
The first dozen muffins and the loaf of bread were plain, but with the remaining batter I threw caution to the wind and added some chopped apple.

Pumpkin Muffins with Apple

Big chunks of apple are obviously not going to go unnoticed, but that actually worked out well.  The addition of apple has give some muffins protective powers!  These have been a little slower to disappear.

Pumpkin Apple Muffins

Let it be known though that 1 out of 3 children did not mind eating pumpkin muffins with apple chunks.  2 out of 2 adults did not mind either.

Pumpkin Muffin Eater

So whether you’re celebrating The Season of Everything Pumpkin or Pester Your Mother for Pumpkin Muffins Month, I hope you eat something with pumpkin in it today.  Or find a mother to pester.  That’s a fine way to celebrate too.


Please know that links to Amazon are affiliate links. It doesn’t change the price you pay, but if you buy something from Amazon after following one of the links in my posts, I earn a percentage based commission from Amazon as a part of their affiliate program. This is one of the ways I generate revenue from the posts that I write here. I promise that I only link to items that I truly endorse. You don’t ever have to buy anything, but if you do, thank you for supporting the site and the work I do here.


Practice Practicing

September 21st, 2013 | Posted by Alison Spath in Healthy Habits - (2 Comments)

You learn to cook so that you don’t have to be a slave to recipes. You get what’s in season and you know what to do with it.

-Julia Child

I got a recipe from a friend earlier this week that called for sausage and kale, among other ingredients.  The only two items I had on hand were the Italian sausage and kale, but those two items sounded like the answer to my What’s For Dinner Tonight prayers.

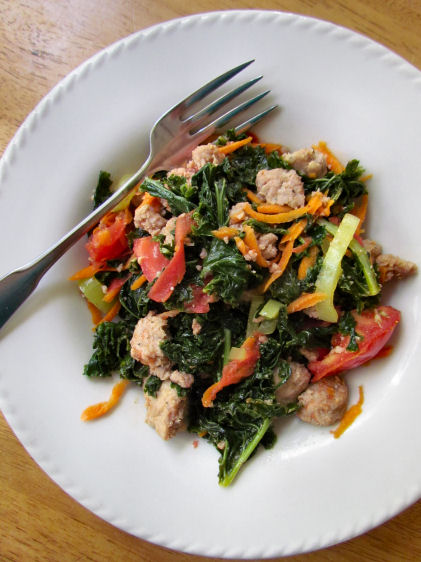
I decided to improvise and soon heard myself shouting “Hallelujah!” as a delicious sausage and vegetable medley of kale, tomato, carrot and pepper was born unto thee:

Sausage_Kale_Veggies

We ate this for dinner and then for breakfast the next day too.  This was slapped together and was great, but it doesn’t really warrant an official recipe.  If you’re still learning to cook a la Julia Child, here’s how to rock this medley:

Step 1: Break up sausage into bite sized pieces and cook large pot.  (Large enough to pile in a boat load of kale.  Also worth noting that my sausage was in a casing and I cut it out of the casing before cooking.)

Step 2: As your sausage starts to brown it will release some oil, you can now begin sauteing diced pepper (and/or onions and minced garlic.)

Step 3: When your vegetables are soft, toss in washed and chopped kale.  Cover, stirring occasionally, cooking until kale has reduced considerably in size and is soft.  Add a little water if necessary.

Step 4:  When your kale is nearly done, throw in any other quick cooking vegetables you might have on hand.  (Given that we are in the thick of harvest season right now, my kitchen counters are littered with fresh produce.  I’m having trouble keeping up!)  It was a last minute decision to add a chopped fresh tomato and some shredded carrot.

Step 5: Season with salt and pepper.

Step 6: Take a picture.  (Optional.)

Step 7: Devour.

Whenever dishes like this come together, I think back to a time when I had no idea how make something like this (let alone find it appetizing.)  But people change, tastes change, so much of it boils down to practice.  The more you do something, the easier it gets – at least in theory.  Do that something enough times and ideally it will become a natural, normal thing that you do.

(Kale and Italian sausage are definitely going to be a new, normal thing that I do.)

I’ve come to see that it helps to think about other things you’re working on as “practice”.  If you’re just practicing, there’s less pressure to be perfect or to get it exactly right.

I practice yoga.  There are advanced poses that I would love be able to do some day, and I know these poses will only come with practice – and even though I’m not there yet, I still get on my mat most days and practice.

I practice mindful eating.  I practice deep, cleansing breaths to keep my cool when my parental patience is wearing thin and I’m ready to flip my lid.  I practice getting one or two loads of laundry done each day so I don’t have to tackle a mountainous mass of dirty duds later.  I practice writing blog posts to share ideas without sounding too stupid.  (Keep practicing!)  I remind myself that these are the things I’m practicing, and if (when) I mess up, it’s OK.  It’s just practice.

When you think about what to you’d like improve upon in your life, try thinking about it as “your practice” instead of something that you’re struggling with or just can’t manage to form into a habit.  “Practice” gives you room to slip up without feeling like giving up.  It’s really just a shift in mind set, but it could allow you to persevere when you might otherwise throw in the towel, beat yourself up or engage in some self-defeating behavior.

Practice eating more fresh foods.  Practicing checking in with yourself and your satiety levels during a meal.  Practice being active a few days a week.  Practice going to bed early so you can get up early to practice a morning walk.  Practice living within a budget.  Practice creating something instead of consuming something (food, internet, TV, stuff) when you’re bored.  Practice thinking about the things you do in life as a practice.

And definitely practice eating kale.  You’ll be an advanced kale eater before you know it.


Please know that links to Amazon are affiliate links. It doesn’t change the price you pay, but if you buy something from Amazon after following one of the links in my posts, I earn a percentage based commission from Amazon as a part of their affiliate program. This is one of the ways I generate revenue from the posts that I write here. I promise that I only link to items that I truly endorse. You don’t ever have to buy anything, but if you do, thank you for supporting the site and the work I do here.


Please allow me to veer off course for a post to share Maxine’s Minecraft themed 7th birthday party. There was lots of running, and watermelon too – so you might be able to say it had a healthy living theme.  Sort of.  Except for the blue jello.  Blue jello that was probably not made from Organic, Locally Grown Smurfs.  I’m trying not to think about it.
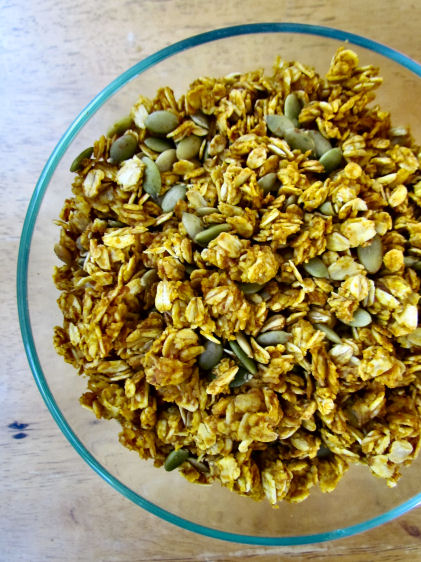
Do your kids play Minecraft?  Mine sure do.  I might even call them “Minecraft Addicts”.  This is why it came as little surprise when Maxine requested a Minecraft birthday party this year.

(If you’ve got Minecraft Addicts living under your roof, take comfort in the fact that Tomorrow’s Enterpreuners are Playing Minecraft Today and that Minecraft is More Than Just Another Video Game.)

Here’s the thing though: I don’t play Minecraft.  I hear a lot about it, but putting together a Minecraft birthday party is not exactly simple if you don’t know a Creeper from an Enderman or what you use to kill either of those creatures.

Our Minecraft party brainstorming began with a request from the girls that Zak dress up as an Enderman and “like, you know, chase everyone around and stuff”.

This is an Enderman:

Enderman
(photo source)

When Zak (who also plays Minecraft) agreed to be an Enderman, I started to think about what it would take to put a Minecraft party together, even though I’m a Minecraft Noob.

With that introduction, here’s how Maxine’s 7th birthday party went down, in chronological order.  (i.e., very different from the order that I figured everything out!)

Since we have a small city backyard and our party was hinging on Zak chasing kids around in a homemade Enderman costume, we decided we’d host her party at a local park with lots of room to run.  We got there early to set up, which included moving some picnic tables together near the playground so the kids would have a place to play while we waited for everyone to arrive.

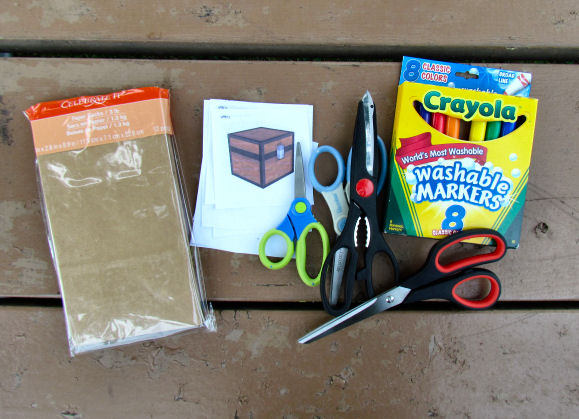
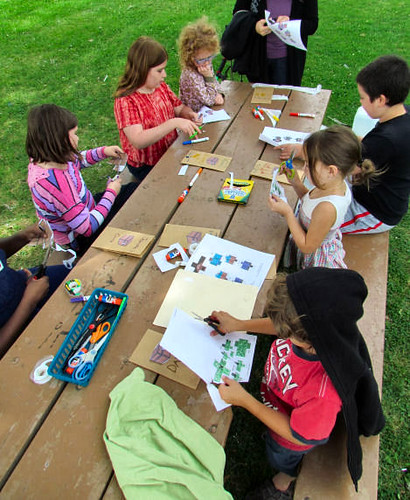
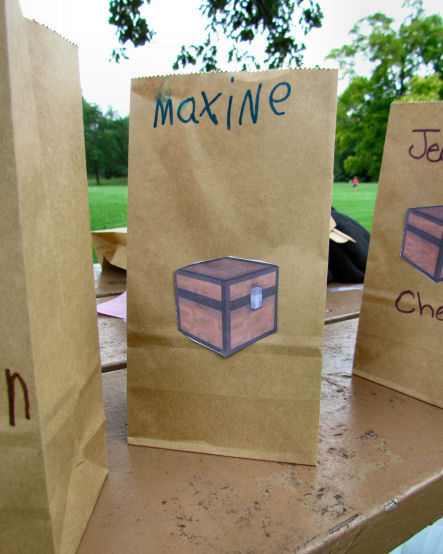
As our little Minecrafters made their way over to our picnic tables, their first task was to make their goody bags.  They had to cut out and tape a Minecraft chest (used for storing items in the game, which appropriately, would be used for storing things they got during the party) and could then write on or decorate their bag as they liked.

Minecraft Party Gift Bag Supplies

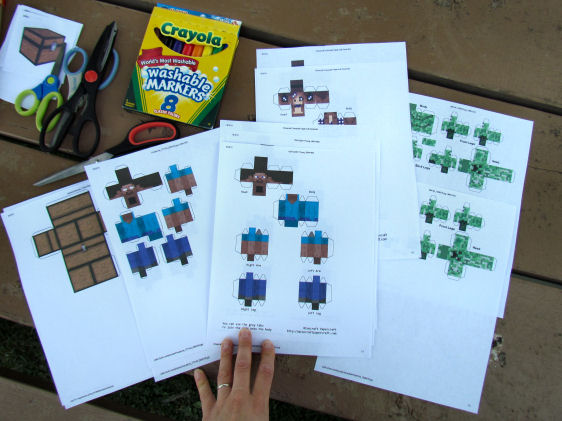
I also had a some paper cutouts for them – Creepers, Chests and Steve.  For those with Minecraft accounts, you can print paper cutouts of their own “skins” (that they have likely designed themselves) to make 3D paper versions of their personal Minecraft characters.

Minecraft Party Paper Cutouts

My girls were delighted with this when I originally showed them, but the cutting is pretty detailed and intricate.

Minecraft Paper Crafts

There was a slight breeze that day that made this activity a little challenging, especially for some of the littler kids.  They lost interest in this before they were done, so we wrapped up this activity and told them they could take them home to finish them later.

Making Minecraft Goodie Bags

With goody bags ready, we moved onto our next task: crafting pickaxes.

Minecraft Gift Bags

While planning this party I came to learn that before you can “craft your pickaxe”, you need a “crafting table”.  (I quizzed all the kids as we went along… “what do you need before you can craft a pickaxe?”  Group answer: “A crafting table!”)

And so they were instructed to run to a picnic table the crafting table across the park where we would craft our pickaxes.

Running to Crafting Table

When we got to the crafting table I asked “what do you need to make a pickaxe?”  (Answer: “Sticks!”)

I threw craft sticks (think wide popsicle sticks/tongue depressors) into the grass and told them to pick up 4 sticks each.

Picking Up Sticks for Pick Axe Crafting

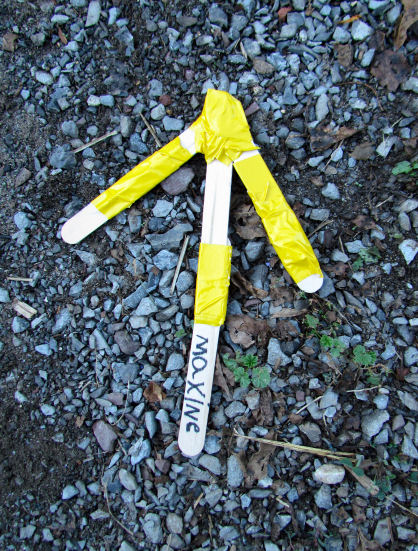
At the Birthday Girl’s request, we made “gold pickaxes” and used yellow duct tape to adorn our pickaxes with gold. I handed out strips of yellow duct tape as we went, the big kids helped the little kids and the whole crafting process probably took 15 minutes or so.  I had them tape toothpicks (with a little speech about being careful to not hurt themselves or each other!) to one end of their pickaxes because they would be using them to pop balloons later.

A real Gold Pickaxe thing:

Gold Pickaxe

Our version:

Maxine Minecraft Pickaxe

Close enough.

(the toothpicks were later removed for safety reasons, but it was taped on and hung off the right side by about an inch)

Pickaxes ready, it’s time to mine!

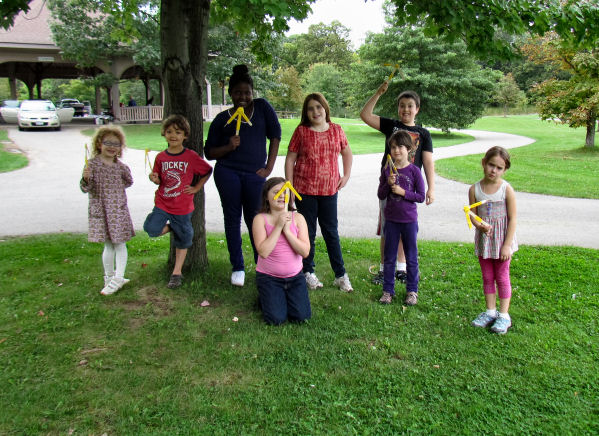
Golden Pick Axes

(Be sure to notice the sad-faced birthday girl on the far right who was bummed that her pickaxe wasn’t as perfect as she wanted it to be.)

Once their pickaxes were ready, we left our crafting table to head back to the party picnic tables for some mining.

(Even this guy got in on the fun.)

Even This Guy Played

As a part of the pre-party set up, we blew up one balloon for each kid (8 total) and tucked 3 slips of paper into each balloon with different kinds of Minecraft ore.

Minecraft Mining Ore Game

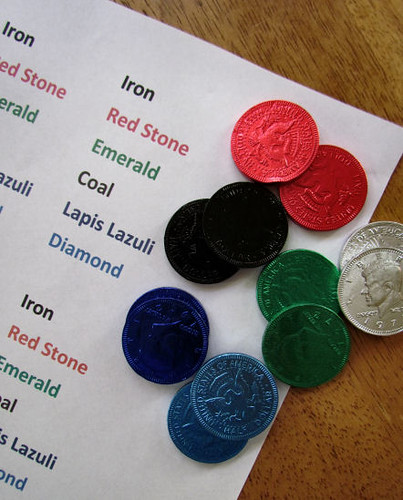
We found these colored foil wrapped chocolate coins at Party City and I put together a simple Word document with the names of each ore that Maxine assigned to each color.  (24 coins total / 8 kids = 3 coins each)

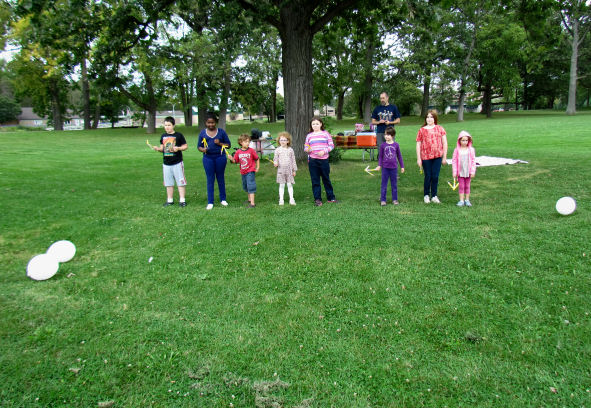
The kids lined up and were instructed to pop one balloon with their pickaxe and find the slips of paper from the balloon and then come to me to collect their ore.

Minecraft Birthday Party Games

The balloons were scattered among a small area, they were all delighted to chase balloons, pop them and then see what they got.  (They traded coins/ore later too, which is  something they can do in the game so that worked out well!)

The next thing they had to do was kill a chicken, pig or cow – animals you must kill in the game for food.  We told them before we could have a snack, they had to hunt!

Minecraft Chicken Balloon Party Game

Once you’ve killed a chicken, pig or cow, you will be rewarded with Minecraft snacks!

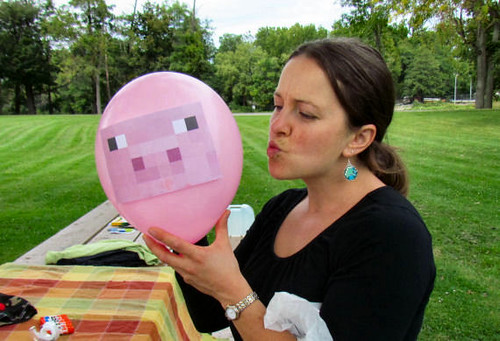
Kissing Minecraft Pig

That’s a pig, in case you were wondering – and be sure to notice my fancy Minecraft diamond earrings.

(Also let it be known that I was told by multiple children that you use a sword to kill Minecraft animals, not a pickaxe.  Alright gang, let’s just roll with it, OK?)

Our party was in the afternoon after lunch, so we served Minecraft themed snacks.

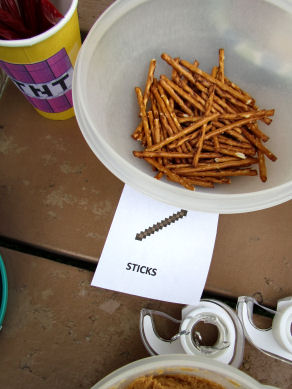
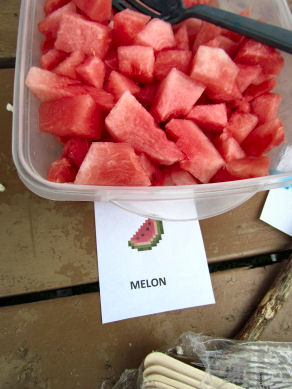
Red licorice for “TNT”, pretzels for “sticks”, melon for “melon”.  (Clever!)

Minecraft Party Food Melon Blocks

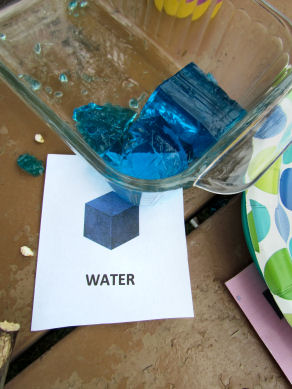
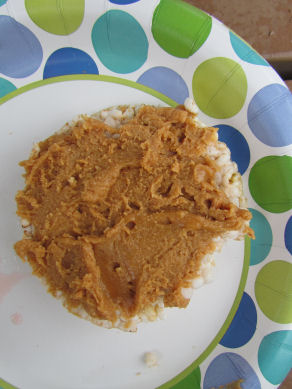
Blue jello for water blocks and Peanut Butter with honey (pre-mixed at home) to spread on rice cakes.

Water Blocks Rice Cake with Peanut Butter and Honey

Peanut butter and honey on rice cakes has nothing to do with Minecraft, but at least it’s a little protein.

(We also served colby jack cheese cut into cubes that the kids decided to call “gold”.)

And then.

And then.  (And then!)  And then it was time for The Enderman.

Enderman

With everyone sufficiently sugared up, it was time to run.

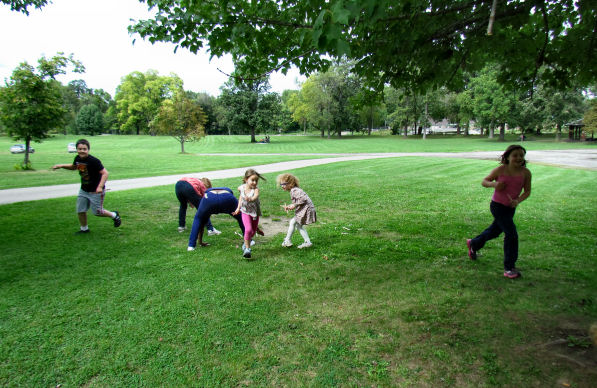
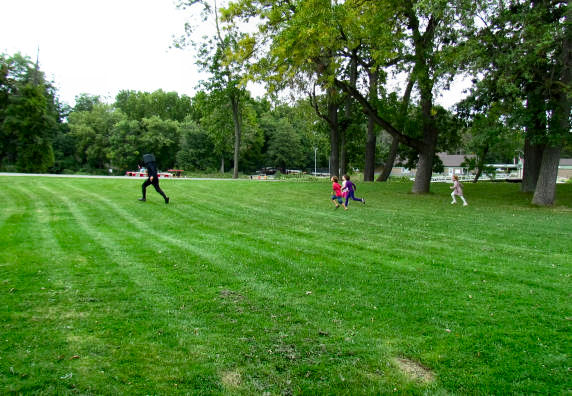
Turns out that Minecrafters chase the Enderman (instead of the other way around) to kill him for Ender Pearls.  Maxine requested that Zak “teleport” around the park.

Enderman Game

Translation:  Zak spent 20 minutes running sprint intervals between trees, dropping Ender Pearls (bouncy balls) every time the kids tagged him.

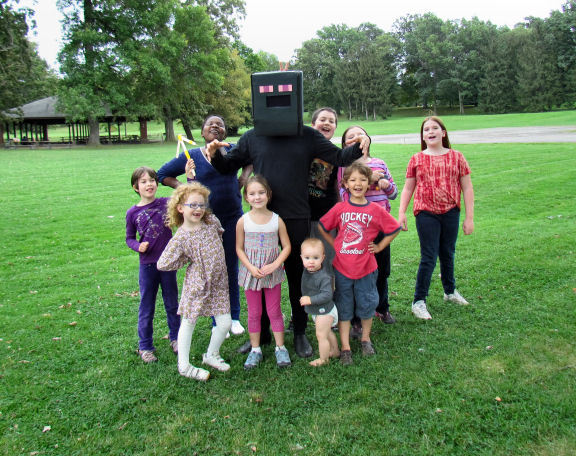
For me, the best part was the pedestrians on the paths watching Zak run through the park in long underwear, black work shoes and a box covered with black construction paper on his head all while being chased by screaming kids.

Minecraft Party Enderman Game

We divided the kids into groups (little kids then big kids) so they could take turns chasing the Enderman and collecting Ender Pearls to put in their chests.

Chasing the Enderman at Minecraft Party

Like an Enderman!

Birthday Enderman Minecraft Party

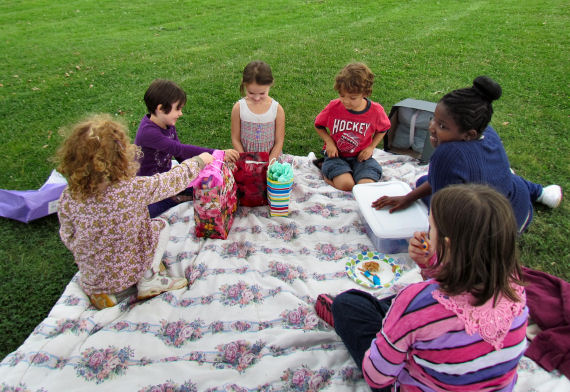
After our Enderman game we adjourned to a blanket for presents,

Presents

and then birthday treats!

Minecraft Sandtemple Birthday Cake

“What the hell is this thing?” you’re surely wondering?  Me too.

A Minecraft Desert temple!

Minecraft Sandtemple
(photo source)

(Dessert Temple?)

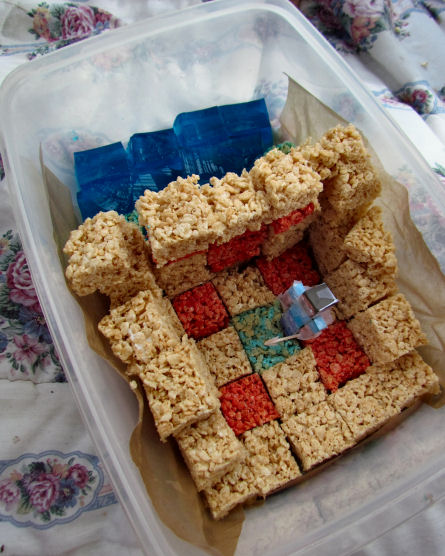
Rice crispy treats were the perfect solution for a party in the park because I didn’t need to be overly concerned with how I would transport them or needing to keep them cold.

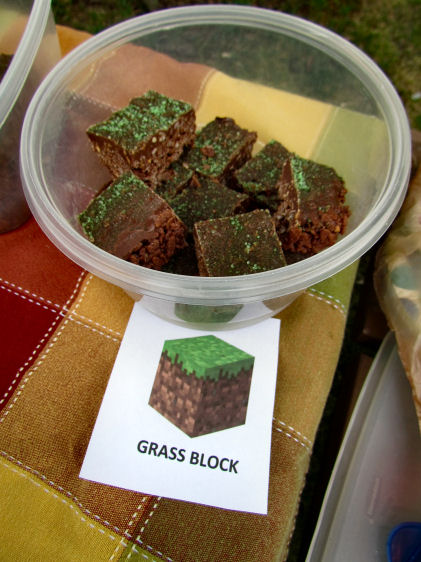
I also made gluten free “Grass Blocks” (with this rice cereal) using this chocolate peanut butter rice crispy treat recipe:

Grass Blocks

(P.S., these were very yummy and I love that you don’t need marshmallows.  I will be making these again for sure!)

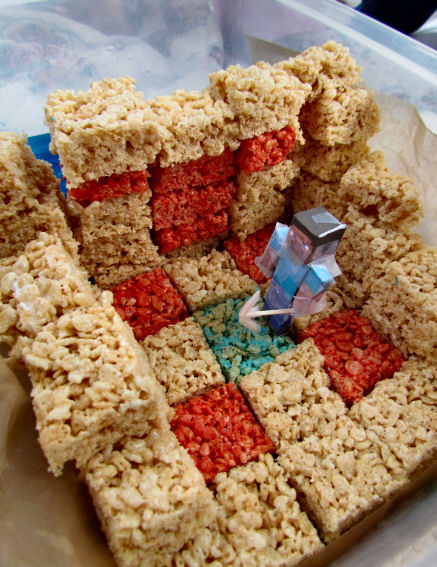
The Desert Temple was Zak’s idea and design.

Birthday Cake Sandtemple with Steve

The small blue square on the inside of the desert temple is very significant… don’t ask me, I just make the treats.

Inside Sandtemple
(photo source)

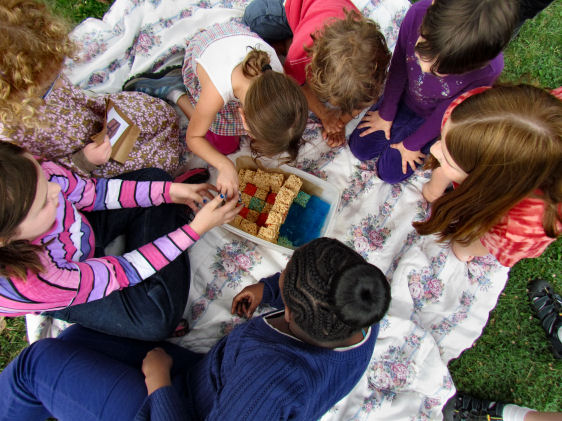
It wasn’t the most perfect or prettiest birthday dessert ever, but the kids knew exactly what it was and got a big kick out of it – so I’m calling it a success!

Kids Loved Minecraft Cake

With their blood sugar surely spiking, we let them loose to spend the last 40 minutes or so playing on the playground with their golden pickaxes (toothpicks removed!) and burning off blue jello and rice crispy treats.

Playtime

The party was three hours long and I was surprised at how quickly the time went.  I don’t really love planning parties and I am NOT crafty, but you do what you gotta do for your kids and I was happy with the way it all came together.  Knowing very little about Minecraft left me feeling very overwhelmed at first, but I managed to chip away at it piece by piece.  (Block by block!)  Zak was a big help too with the planning and preparation, and I’m very grateful he was willing to run around the park in his underwear because that definitely made for a lot of laughs and entertainment. I put this post together to share our ideas if you might one day find yourself scrambling to plan a Minecraft party of your own!

Thanks to the world wide web and my children (and husband) for answering all my Minecraft questions, we were able to put this together with just a couple days of true planning.  We started brainstorming a few days out, spent one afternoon searching the web for ideas and making lists.  Two trips to the craft store, one grocery shopping trip and one visit to the party store later, we were ready to go for an afternoon of fun with a few of our Minecraft loving friends.  There are not a lot (if any) Minecraft items in stores (yet!  but I’m sure it’s coming) so be prepared to search through Google Images and to use a bunch of colored ink from your printer too.

More Resources: (and where I found a lot of ideas and inspiration with what we put together)

How to Throw a Simple Minecraft Birthday Party

Minecraft Party

Minecraft Birthday Party: Printables, Crafts and Games

Minecraft Party Ideas


Please know that links to Amazon are affiliate links. It doesn’t change the price you pay, but if you buy something from Amazon after following one of the links in my posts, I earn a percentage based commission from Amazon as a part of their affiliate program. This is one of the ways I generate revenue from the posts that I write here. I promise that I only link to items that I truly endorse. You don’t ever have to buy anything, but if you do, thank you for supporting the site and the work I do here.